


Environmental Portraits: Farrier
Photographers have an easier job than farriers. But there’s still a lot to learn if you want to do it right.
Environmental portraits of people are one thing. Environmental portraits of people and animals are another!
In this class, you’ll follow Karl as he photographs a farrier at work with his horse, working in a dusty stable-yard in bright sunlight.
This class will teach you to overcome challenges, including cutting out ambient light, balancing multiple lights, and getting the best composition.
You’ll see the step-by-step process of achieving this shot as Karl shares his camera settings and lighting setup, explaining his thought process and creative decisions.
In this class:
- How to photograph environmental portraits
- How to reduce ambient light when using flash
- How to combine natural light and flash
- Lighting setups for environmental portraits
- Camera settings for environmental portraits
Questions? Please post them in the comments section below.
With many environmental portraits, your subject remains in a fairly fixed position. However, there are exceptions to this, as was the case with this shoot. Instead of working in a fixed position, my subject kept moving between his rig and horse; this meant a versatile lighting setup that would cover both positions was essential.

A versatile lighting setup was required as the subject was moving between his rig and horse.
Working in fairly bright conditions, in a concrete stable-yard also meant I had a lot of ambient light to deal with. This made it particularly tricky as I wanted to achieve a more moody, atmospheric image. This meant I had to adjust my camera settings accordingly to cut out as much daylight as possible.
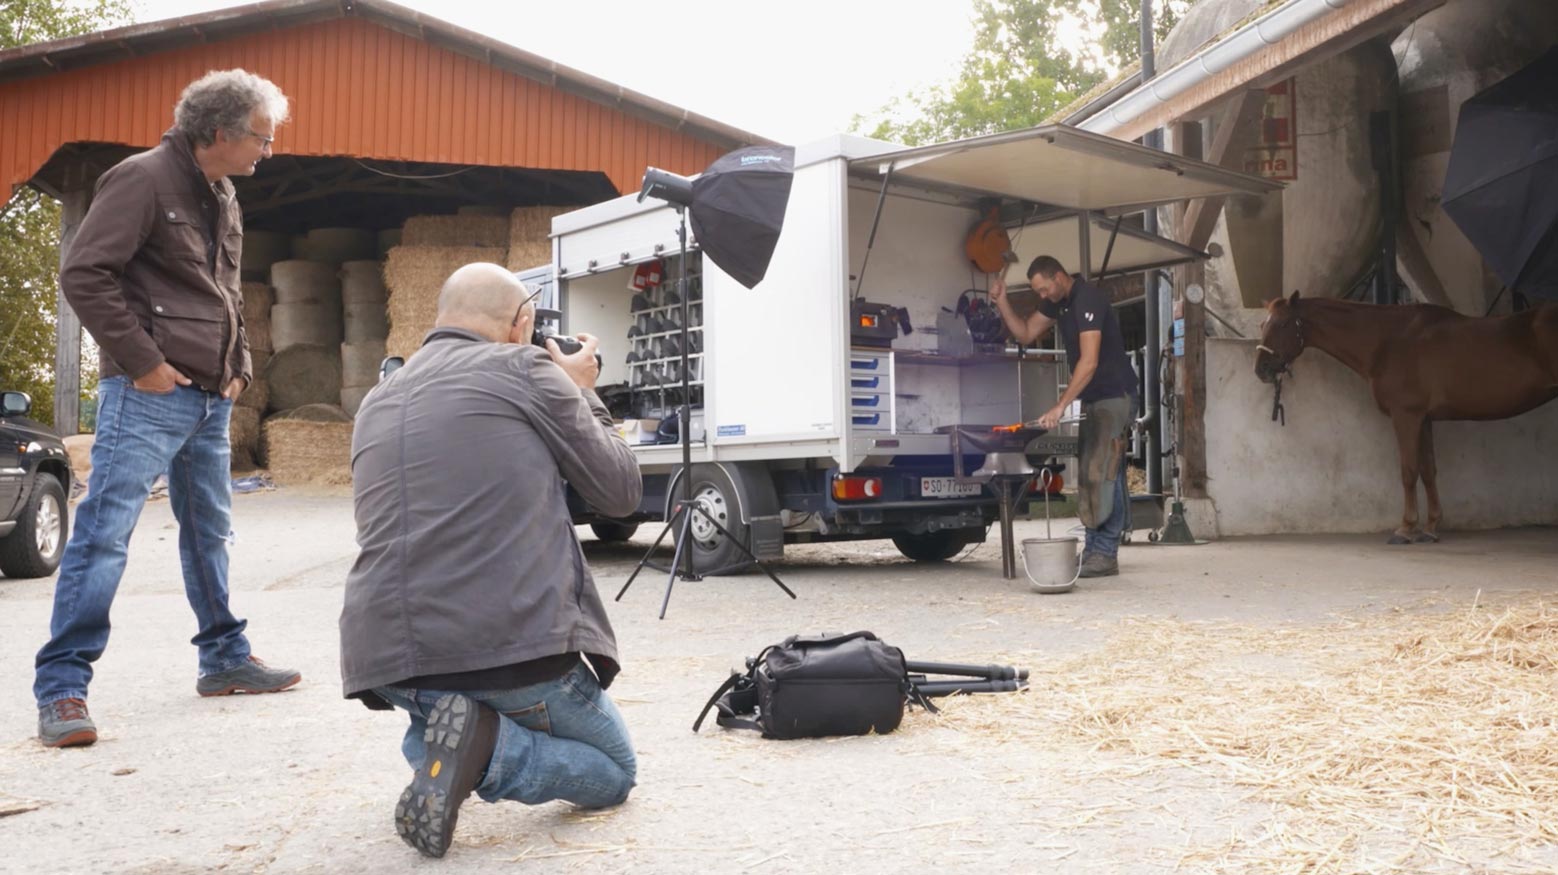
For this shoot, camera settings and lighting had to be adjusting accordingly to cut out the ambient daylight.
Finding the best composition was a further challenge that required testing a few different angles, adjusting my lights accordingly and even asking my subject to change the way he worked. In the end, after careful thought and attention to detail, I was able to get a couple of shots that I was very pleased with, as you’ll have seen in the class.
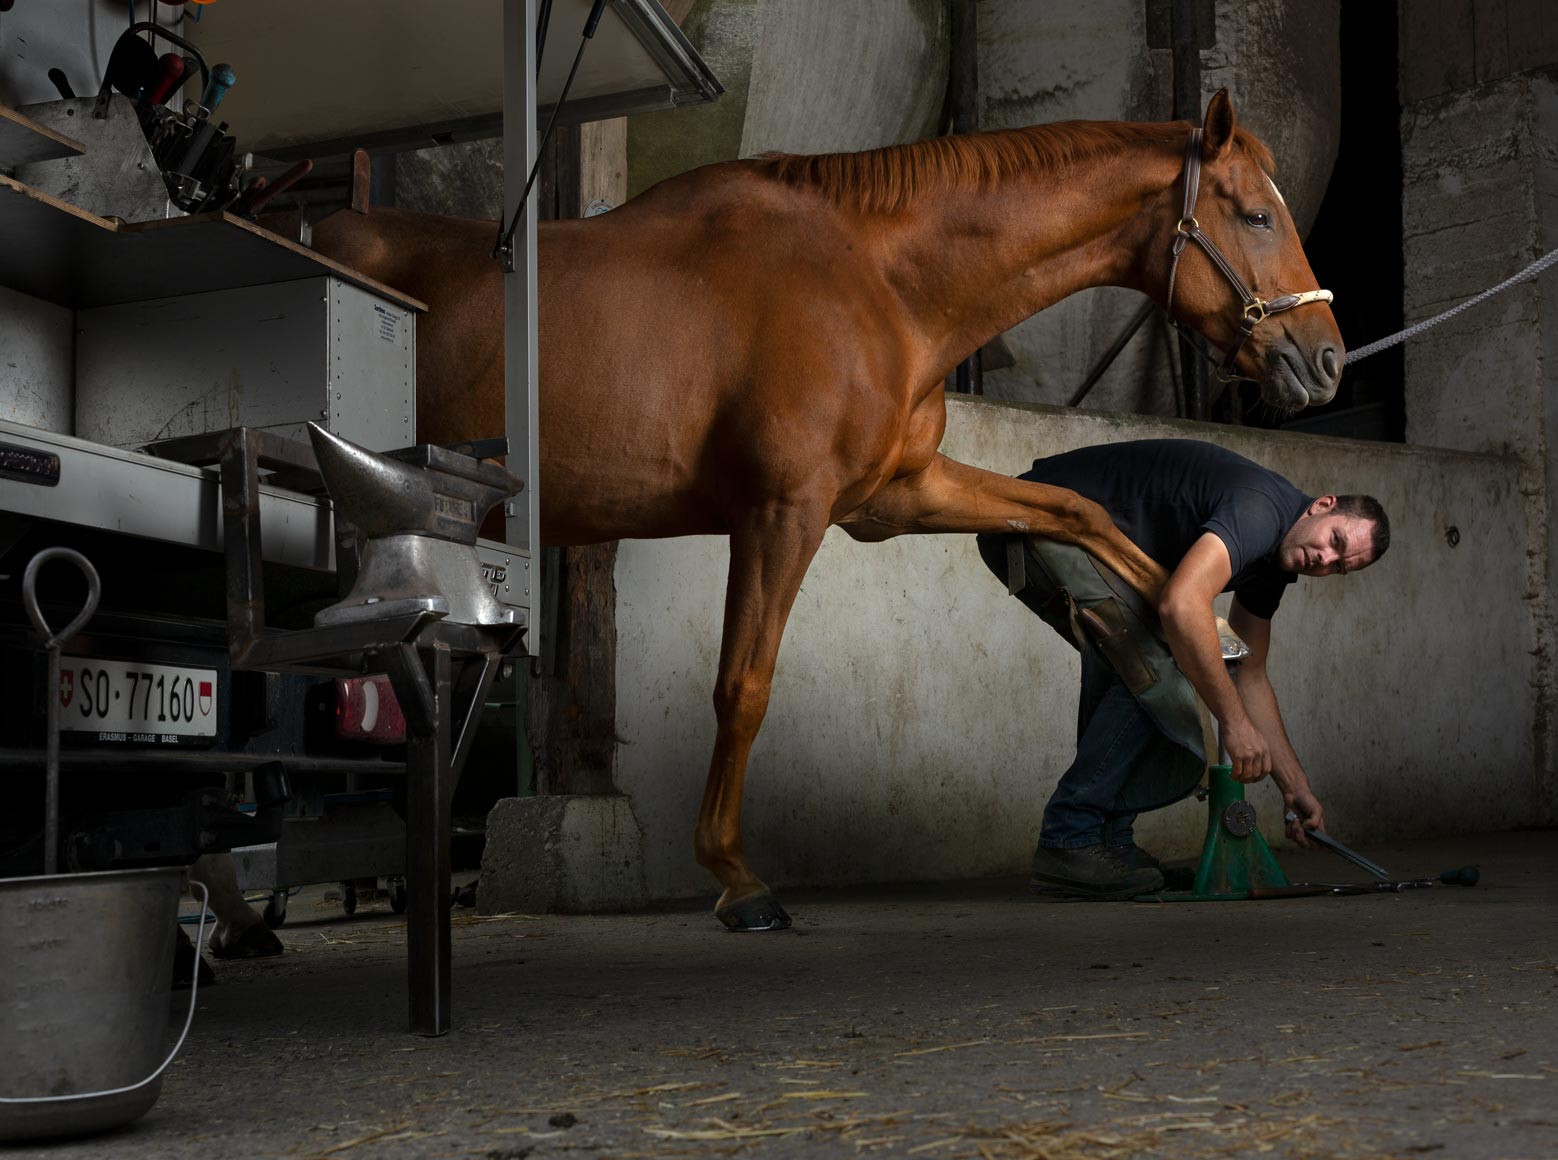
The final environmental portrait image of a farrier.
Comments
I’ve just watched a few of these environmental portraits.. with the exception of the tech in a white room, you are generally isolating the subjects by toning down & controlling the background (lit but duller) and popping the subject with stronger, crisper light.. Even the lab tech pops because she has a richness of colour and contrast in comparison to the background. Is this generally the approach to use the light to focus attention on the subject through contrast & richer colours? I suppose additionally using selective depth of field as well. Are there any other techniques you have up your sleeves that come to mind? I’m going to try an environmental portrait in the next couple days.. poorly lit location of course. Four hours away.. been more than a year since I was there, but I remember the location & equipment will require lights. Bringing speedlights & some studio lights to work with.
Tech session.. I meant Cake decorator. My bad, was going from memory. Another technique you used there.. occlusion. I guess really everything comes into play.. combing long exposure with strobe comes to mind.. think on your feet and assess the location.
Hi Gary, yes absolutely it’s always about that juxtaposition of making sure the hero stands out from the supporting cast and not the other way around. The environment is there to tell a subtle story but not to win the show.
Hi Karl!
Hope all is well! Apologies in advance for the long question. I have a Vintage Style Fashion Editorial photoshoot coming up and it is on location in a beautiful historic mansion. There is a ton of rich dark brown wood walls everywhere. The lighting in there is pretty terrible….think Wedding Hall. I plan on bringing 2 lights with me, however I normally shoot tethered in my small home studio. Because of the location and my access I think I’m going to be running and gunning to make the most of my time there. So tethering will just be cumbersome. What is your recommendation to get accurate exposure when you only have the back of your camera display to rely on? Are there specific settings I should definitely adjust to make sure I have somewhat accurate images and no awful surprises when I bring the images back to my computer? I normally photograph with my Fuji XT1 (35mm and 50mm f2 lenses) but I am considering using my Nikon D7100 for this shoot because I have (50mm F1.8 and 70-200mm F4) I definitely want to have some background blur and mix in some natural light . Massive thanks! -Ted
Hi Ted, most modern cameras have pretty accurate displays plus they have a zoom, so zoom in on the face and check the details, zoom in on the shadow areas and highlights and take a look on your test shots then check the histogram looks about how it should – https://visualeducation.com/class/understanding-histograms-how-to-use-them/ all of your settings should be in manual including your flash power and then once your happy with your test previews just start shooting and then repeat again on the next setup. I’d go for one very large softbox or scrim for the key light on the model so that you don’t create harsh shadows elsewhere. Then one or two lights with smaller softboxes aimed at the ceilings for a bit of ambient room fill. You can then adjust your shutter speed to decide how much of the room lighting you want to allow into the shot.
Truly appreciate your help with this Karl! Very many thanks! I will review the histogram lesson and great advice with the softboxes. This really helps reducing my anxiety regarding this upcoming project.
Great lighting! I love it.