


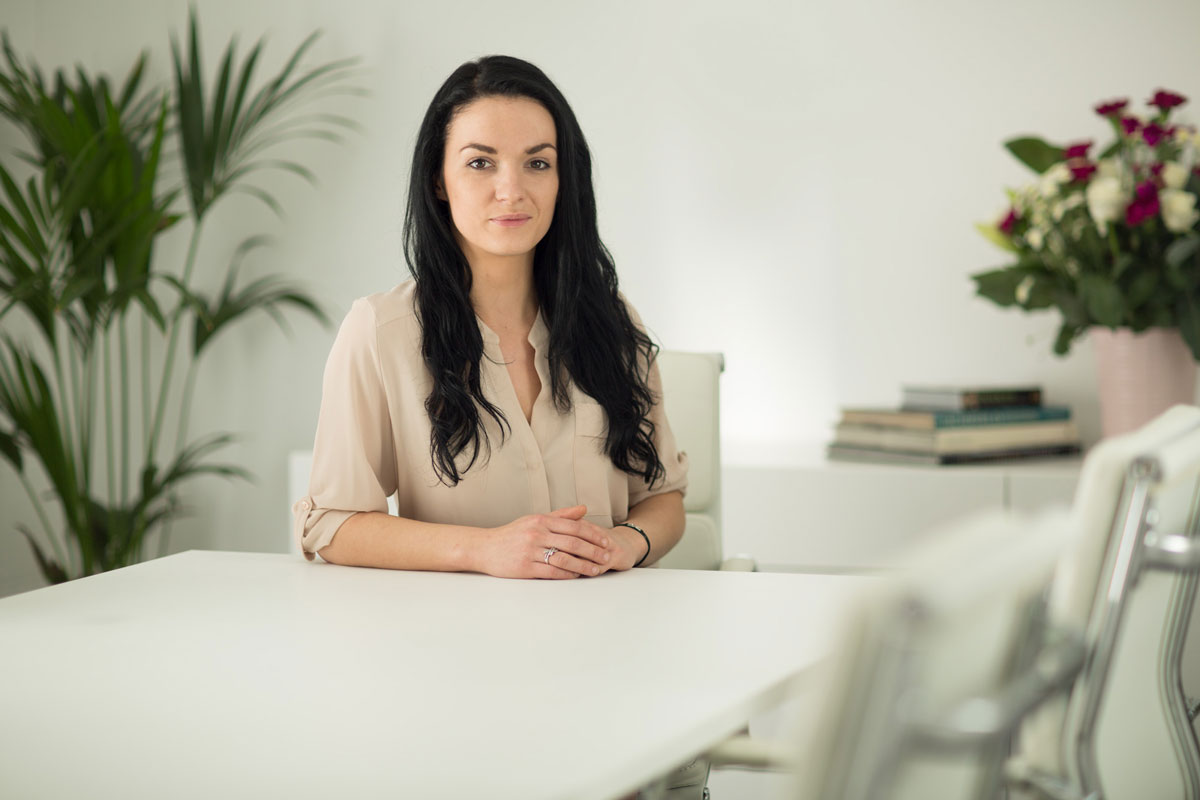
Small Office Space Portrait
Working on location at a clients office can often be a daunting task, especially if the space to work in is small. In this business portrait photography class, Karl shares a number of useful tips to help you get great results.
In this class, Karl explains the common problems one may face when doing a shoot such as this. He covers what to look out for, how to overcome common issues, how to pose your subject and how to light them.
In this class:
- Portrait photography: Environmental business portraits
- How to take business portraits using studio lights
- How to photograph business portraits on location
- Useful equipment for portrait photography
- Posing ideas for business portraits
- Camera settings for environmental business portrait photography
Questions? Please post them in the comments section below.
Comments
@21:43 Ending with a big pile of sausages.
Lidia really held that giggle, If I ever worked under Karl I would’ve laughed 😀
She’s a pro haha
Hey Karl, what were your camera settings?
really super tuto (posing, simple lighting, setup of vase, …) ! this is the kind of video I am looking for.
how would you setup light if you wouldn’t have the two windows and same room width ?
Is it possible to install two octobox 65cm against the two walls ? just a grid on bowls would make light too harsh
thanks for advises 🙂
marc
Hi Marc, I’m glad you enjoyed the class but you question makes me wonder if you understand the concepts and basic physics of light properly as your questions seem to be looking for solutions to a setup that suits particular equipment? There are many factors that would affect the image if there were no windows, such as Inverse square law, size of windows, type of light coming through windows (direct/diffused?) and Angle of incidence. To replicate the light would require an understanding of the physics of how to replicate that light and it could only ever be approximated with studio lighting internally due to the above or unless you could find a way to put the studio lighting outside the window with diffusion rolls on the glass. I could certainly make the light look similar with a few tests and working out which reflectors, spread etc would match as close as possible my points above but I could only do this with some tests. The initial concern for me would where to position the lights to bounch of the wall that they don’t block the path of the reflected light etc etc. It may well be that one ‘bare bulb’ light facing the wall would actually be the best solution. I would recommend you watch this class again https://visualeducation.com/class/introduction-and-understanding-light/ and then more of our other classes to gain the experience necessary for you to know what would be the best starting point for a given situation. Often photographers want formulas and instant answers to ‘how would I make it work if it was like this?’ but in photography it’s a bit like asking a painter ‘how much paint would I need and what colours if I wanted it to look like this on this size canvas?’ these sort of questions aren’t completely answerable by the artist unless without fully understanding all the variables and making a few strokes of the brush first. My guess however based on know the room and what you’re saying is that if I couldn’t put the lights outside that I would have one bare bulb light facing the wall and one with standard reflector (no grid) facing the wall.
Thank you Karl,
very good idea the bare bulbs towards the walls, also with ad200pro !
Yes, I think I have some experience in photography, flashes, diffusers/reflectors, flashmeters (nothing to do with yours of course) but I am looking for tutos where I learn how to be fast, portable,…
So, when I see one of your corporate setup with a 180×120 diffuser (which is optimum I know it), two 150cm octbaox, three syros… I think it is more for studio where you don’t disassemble anything. For instance I am more oriented magbox, westcott rapid box, westcott apollo orb 43″ and eyelighter 2, westcott xdrop background instead of two tripod, bar,…… to have fast setup. I am not skill to install rods of a 120x30cm stripbox on site with high pressure and stress. So, based on these portrable solutions, I am looking for easy pro setup to make cross lights, rembrandt, …
Narrow room question is not to tickle you 🙂 My boss just asked me to make “pro” pictures (for free) of my collegues, workshop, people in repair of electronic equipment to promote job-carreers on our linkedin site and I know our meeting room is narrow and without windows 🙂
So, I was worried there is not enough width to accomodate the depth of three tripod legs and softbox.
So, I am going to move a lot between rooms with a minimum equipment.
You cannot imagine how useful for me are your explanations about posing, removing TV, adding books, glasses, vase… 🙂
best regards
marc
Hi Marc, I understand the need for portability and speed in these cases. Basically anything you can find that is big and easy to assemble such as large umbrellas etc will work well. Even foldable V flats with lights bounced into them.
Is this the lens you place on your full frame Canon EF 85mm f/1.2L II USM Lens?
Hi Paulo, yes it’s the 85mm 1.2
Sir,
When shooting in wide aperture,what focusing method use? Focus recomposing method may have slightly out to subject face, is it correct. I am in Kerala, India, a wedding photographer, Can you show
group photos shooting tips in wedding events.
Hi Benny, I often manually focus or you can use a focus selection point if you have multiple ones to choose from.
Hi Karl, thanks for sharing your knowledge with us, I have learned more in two months with KTE than in 2 years in other courses!!!!
In the coming days I will have to do the same job for a real estate agency but their office is a little smaller than yours.
Is it possible to do the job with a 50 mm lens on a full frame camera and 2 softboxes?
Thank you!!!
Hi Cristian, thank you for your feedback. Yes it’s possible but each room shape, height, space will present it’s own challenges. I’d prefer not to use a 50mm unless I had to i’d rather push up to at least 70mm if I could. Also 2 lights are great but don’t commit to just softboxes, your lighting setup might be better with one bare bulb light pointing away from your subject to fill the room and one softbox on the subject but as I said it all depends on the room. Get there in plenty of time and run test shots. If you don’t have an assistant do the tests on yourself with a self timer.
Hi Karl,
This was very nice idea..
would bouncing the light on the ceiling help as well
Hi Latesh, in a small office like this there will inevitably bounce off the ceiling anyway but whether you should direct light there will depend on if you want more top lighting or not and also based on the size of the office and the height of the ceiling.
Karl,
Thanks for all the material! It has been a huge help! Was wondering if you have any tutorials on how to approach lighting a group of people like a band or a group of businessmen. That would be super helpful!
Thanks.
Hi Kyle, we’ll consider that for the future.
Hi Karl I hope everything is well for you, I just want to thank you for the knowledge that you kindly are sharing, my photo skills are gradually improving thanks to you.
And every penny that I have invested on Karl taylor education it’s been worth it.
Well I’ve got a question for you when you do a bussines portrait on lacation what is the minimum equipment that you take? at the moment I only have a canon camera and I have aquired three flash lamps thanks for your help
Hi Ernesto, thank you for your kind words. 3 lights is all you should need if you’ve got some form of modifiers such as softboxes or scrims to use with some of your lights. You’ll see some business portrait examples in our ‘Portrait’ section and in Live Shows Replays. Also take a tripod and a reflector like a lastolite and a stand and clamp to hold it.
Hi Karl,
Could i create this scenario with a couple of speedlights if i don’t have the more expensive studio lights available?
What would be the downside to this approach?
thanks,
Adam.
Hi Adam, yes of course you could. I’d use them in full manual mode and adjust the power to suit the scenario, TTL just won’t cut it. The downside is you don’t have any modelling lamps to see what you are setting up.
Thanks Karl
Hi Karl, Great video.
Based on your experience,in business shots like this one, how many poses or different scenarios in average do you create for a single person?
I mean, if you could throw an average, how many different looks does a business person go for when they request your services
Thanks,
Raul
Hi Raul, I create one. The best one for the person based on the room, the shape of them, how they sit and what they look like and how comfortable they are. They are generally only small tweaks or variations to what you saw here.
Karl, at timeline 10:07 you scrimed the outer window, but I noticed you had a shade that might did the same, if pulled down. Did you use the scrim so you could have a consistency in the light given the fact that you used the same scrim on the inner window? Would have been a difference if you just pulled the shade down?
Hi Bogdan, the shade on that window was a solid black out shade that blocks all the light, had it been a diffusor type shade then yes that would have worked.
Karl, using the flash set up, you said your aperture with the 85 mm Lens was 1.8. How about your ISO Set up. Was it at 100?
Yes
It would be nice to see how Karl would approach this shot if the window and glass divider weren’t available. Solid walls in a small room would have created a different challenge.
Hi Michael, if it had been that scenario I would have possibly opted to put a softbox on my right (to the right of the chairs) but out of view of camera and put a white board over the window and shone a light with a wide grid into that white board/reflector. Every room has its own challenges and I’ve shot hundreds of business people in a variety of situations from small offices at home to executive offices at the top of skyscrapers. I always found using an assistant the best way to test the light and build a solution, this can sometimes take an hour or more of testing and repositioning lights. But the most important thing is getting it to work and then getting the client in when you are ready and the key is that I’ve always made sure I left plenty of time for the testing. It’s the knowledge of light in chapter 1 of this ‘Light Source’ and the earlier chapters of this course that means you can usually work your way out of nearly any scenario.
Karl good point but what if u at lowest power on siros 800l and it still to much light?
Hi Walter, I would say at the lowest power you should be fine but when I have too much light and I can’t go any lower in power then I put a Neutral Density Gel on the lights.