
Fashion Retouching: Practical Demonstration
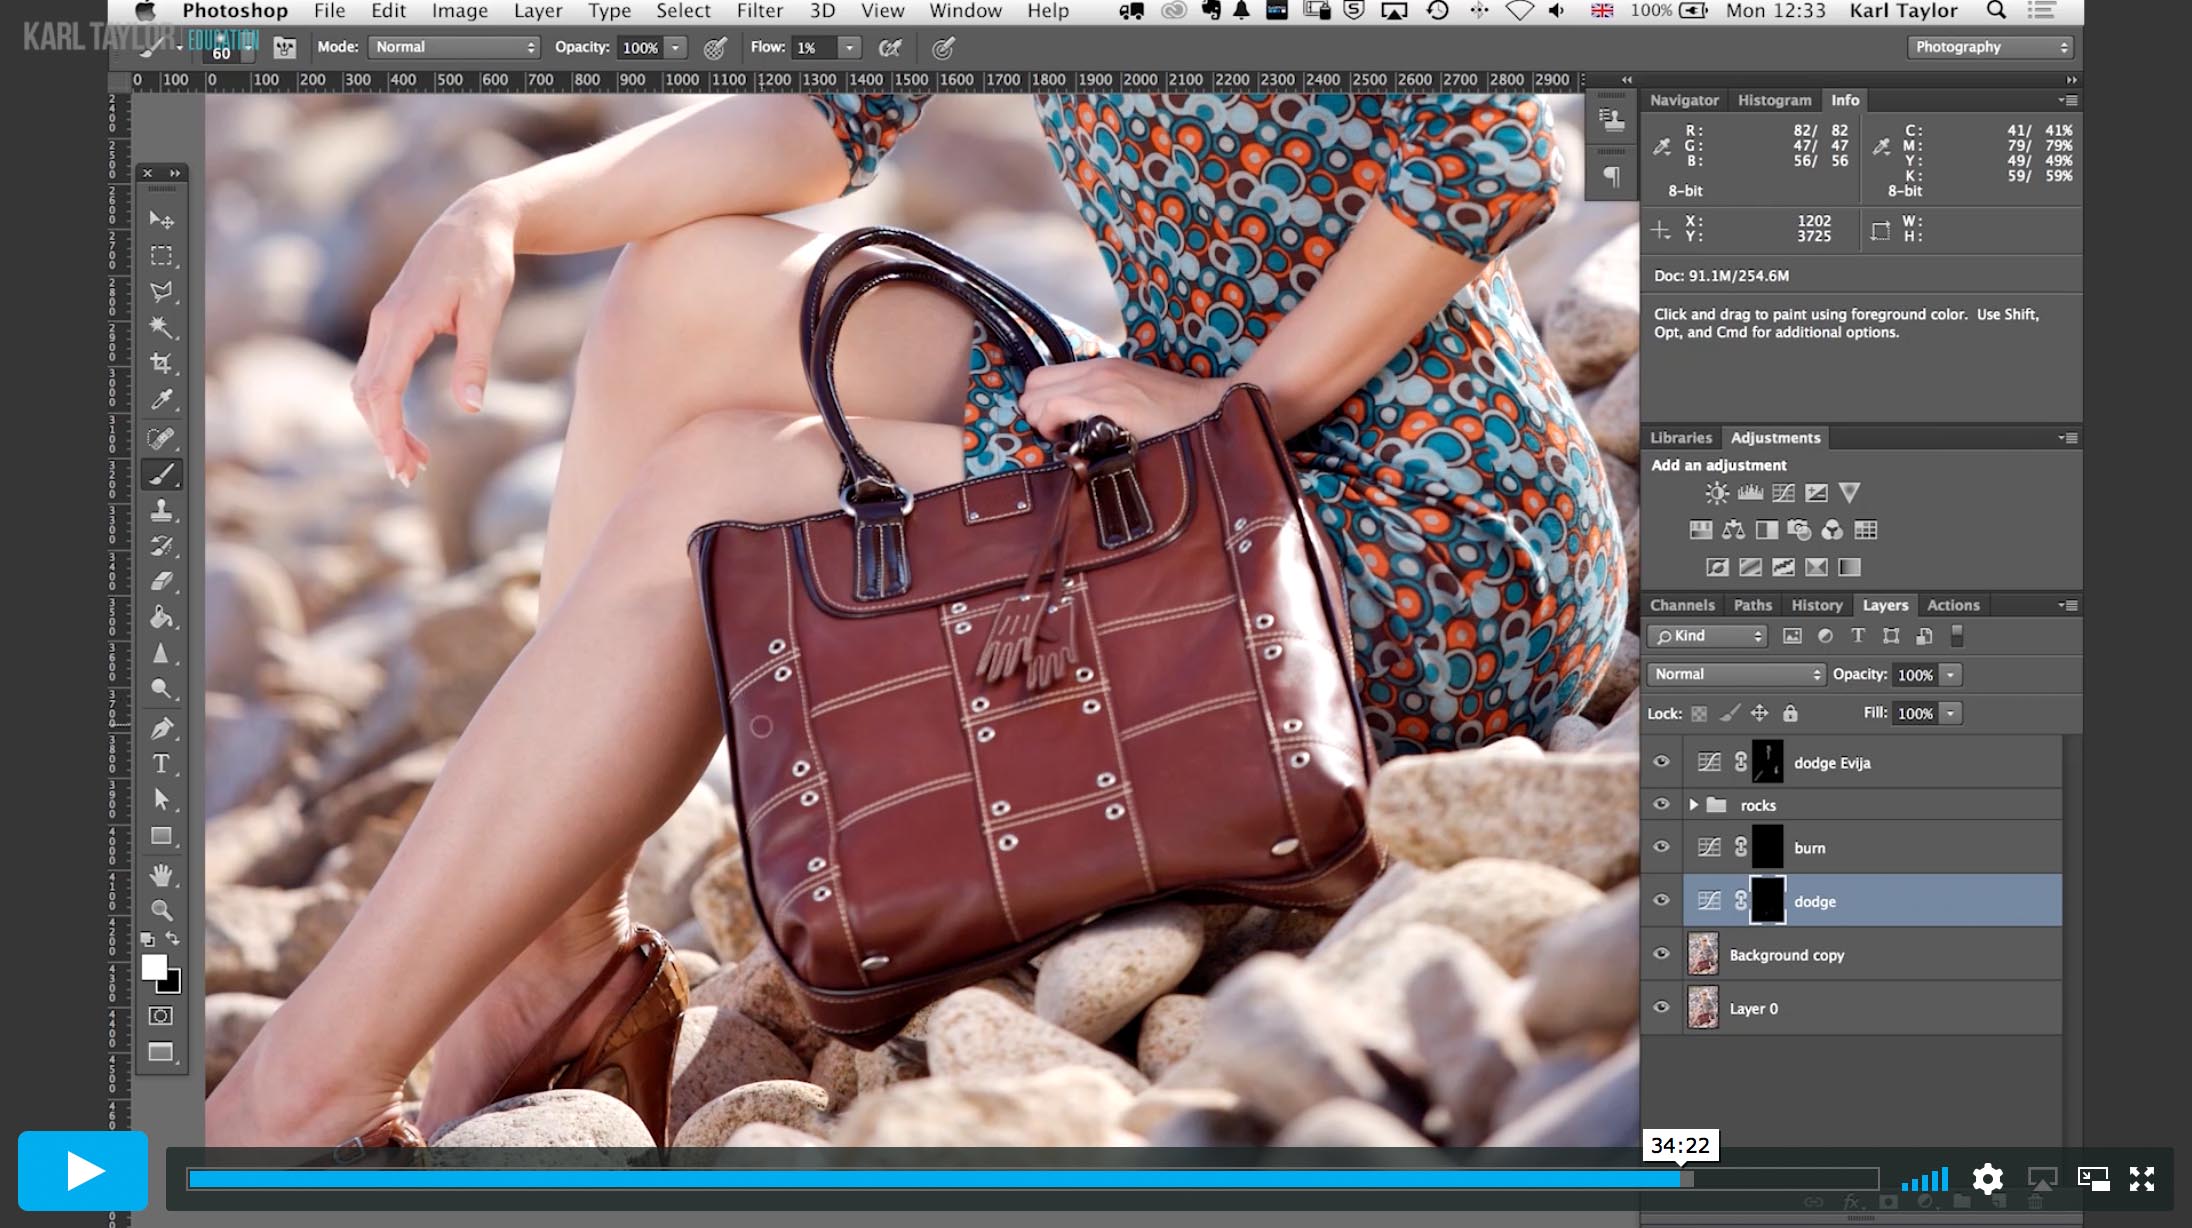
When it comes to retouching, it’s important that you’re able to identify which areas of an image need adjustments, which is exactly what Karl focusses on in this photography class.
Here he explains his retouching workflow for a fashion image and the different tools you could use to make the necessary changes. Using tools such as the Clone Stamp, Liquify and Burn and Dodge, he demonstrates how it’s possible to guide a viewer’s eye through the image and remove any unnecessary distractions.
In this class:
- Photoshop tutorial: How to retouch fashion images
- Fashion retouching tips
- How to identify key areas for adjustments
- How to use the Clone tool in Photoshop
- Photoshop Liquify tool
- How to Burn and Dodge correctly
- Using actions to speed up your workflow
- Adjusting color in Photoshop
To learn more about identifying how to improve an image, watch our live Fashion & Beauty Critique, where you’ll also learn about useful retouching techniques.
If you have any questions about this course please post them in the comments section below ?
Comments
Hi Karl, one question I always wanted to ask to a professional, incase where we are creating or modifying existing pixels like by using clone stamp/liquify/blur etc, it always ends up ruining the grain structure of the image. I know in Visual effects, we denoise the image, work on the image and then regrain the modified part to match the camera grain. Is this something you consider, specially when you are working for high resolution prints? If yes, how do you do it? Adding grain in the filter does not always match the pattern or size.
Thank you.
Pradeepto
Thanks.
Hi, yes you are right and if you follow the rest of my retouching classes in this section you will see that most of my cloning work is not cloning it’s actually burning and dodging. In other sections you will see how I use the apply image command in a form similar to high pass filtration to separate low spatial frequency from high spatial frequency information and deal with them separately. I also put noise back into selected areas as well as across the whole image too and you will see that as you progress through more classes.
Incredibly well explained. Every single step is explained and shown. I have been working with photoshop for a long time but not as professional as I would like. These videos just make me better. I learn something new with every video. Many thanks for that and best regards from Cologne.
Thank you Norman.
Hi Karl, thanks so much for all your efforts. Your videos have really speed my photography skill from absolute zero to an intermediate level in just two months.
I use adobe photoshop creative cloud and when I tried to use the liquify function for this same image, the image didn’t open with the liquify interface even while on the right layer, instead I have just a blank medium gray space.
I’m not sure if this is something you can help with, but I look forward to hearing from you. Thanks
Hi, were you on the correct layer when you opened liquify?
Yes, I was. I found a solution already from the adobe community online. Thanks
By the way, I just realized that I have an old picture of me on my account profile, was wondering if there’s a way to remove or change it. I didn’t put it there in the first place.
This is a masterclass.
There is so much value in this one module.
The prior 9 chapters are foundational and very important but this one stands out.
The liquify tool was amazing. It raised a question for me. Do you have a KT set of ethics or principles for how you use this tool? The modifications you applied were very good and my takeaway was that your results appeared natural (meaning this model or another human could look this way), but this tool seems very powerful and could be used badly. I value your coaching and I wonder if you have some principles you apply when using this tool?
Overall – I would pay my annual sub for the first ten chapters of this PS course! What amazing value for any photographer.
Hi Derrick, very kind thank you. Yes the liquify tool has the ability to be used to change the shapes of people and objects. But remember lenses also change the shapes of people and objects as does the viewing angle. So nothing we see in a photo is exactly as it would be viewed with the eye, i’m sure you will have recognised how distorted people can look when shot with wide angle or different lenses! For me using the liquify tool is simply to smooth the aesthetics and make the image more easily absorbable. This might be reducing a nose a small amount or fixing some bumps in clothes. When we shoot models for advertising we are hiring models that are already aesthetically more perfect than 99% of the rest of the population so that in itself is artificial. If shooting ordinary people then I would think it would be more appropriate to keep their original character or their own friends and family wouldn’t recognise them, it’s always a delicate balance but it needs to be considered in conjunction with the knowledge that the way photos are created and the way we view them is different already to how we ‘experience’ people in the real world. I hope this helps.
Thanks a lot for the long answer Karl. That is good advice – and in particular to keep the modifications appropriate to the expectations of the viewer. I will keep the use of liquify small and simple for now as my guess is that it is easy to overdo it until I master the tool.
Loving the PS tutorials. Very simple and effective.
👍
Can´t thank you enough for these method in dodging and burning. It makes it more practical to understand and less frightening to do or apply.
Thank you, glad it was helpful.
I can do just about everything using my capture one pro 20, but unfortunately, I do not have a warp brush!
I very much enjoyed seeing how you used the Dodge and Burn technique in this fashion shot.
Thanks James.
I’ve been going though these LR and PS courses and are thoroughly enjoying the information given. I will be concentrating more on using PS for editing over LR, as the benefits I see from your demonstrations are too great to ignore. Time for me to buckle down and really get to know PS.
Hi Geoff, great stuff – The Photoshop for Photographers course is the best one to go through first.
Hi Karl.
If you are using pen pressure than what is the point of putting flow to 1%?
Regards,
Mahir
Hi Mahir, I don’t have the pen pressure setting switched on.
just ordered my tablet and cant wait to use it. glad to know that the pressure can be turned off.
HI Karl,
Just curious what lighting techniques were used when taking the original photo.
Best regards,
David
Hi David, it was a very old shot from maybe 10 or more years ago, if I remember correctly I think it was a large silver brolly on my left and then sunlight backlighting her from the right.
Hello!
This is a very useful video for me. In less than 40 minutes, I received two very useful information that I can use during my daily work. Until now, I’ve solved them more cautiously.
Thanks!
Thank you Attila.
I wonder, Karl, if you ever have to step away from an image and come back to it for fear of losing the plot, so to speak? Do you process, sleep on it, then confirm/alter? I suppose the point you made elsewhere about planning your action must help, and talent/experience too! Regards, Dave.
Hi David, yes definitely if i’m embarking on a lot of burn and dodge then I often take a break and sometimes sleep on it. It’s always good to look at your work with fresh eyes.
When you want to dodge and burn non destructively. Any particular reason you don’t use the 50% grey in overlay mode method?
Hi Michael, the curves adjustment layer with masks is a more controllable way of B&D and is also non destructive as the work you are doing is on an adjustment layer. In this course I demonstrate that method and a couple of others so people become familiar with the tools. Cheers Karl.
Nice pace of lesson, and the thoughtful delivery makes it easier to take in. Excellent clarity of explanation too. I was hoping you would reduce the blast of light at the right of the bag and the bright rock to the right of the elbow, but it is all about taste and judgement and you have a lot more than that than me Karl. That liquify tool is mighty handy ☺
I find that sometimes dodging desaturates or burning over saturates the color on those edits and I must use the sponge saturation tool to correct and blend them properly.
good point
Enjoying these a lot, not so much for the photoshops tools, as I have been using photoshop for a very long time, more so, your thought process as to what needs changing to improve an image, there is so much out there on the technicalities, and the ‘general rules’ not so much on individual insights as to what the photographer regards as a good image, obviously this changes a lot dependant on taste, but still good to watch, 🙂