


Healthy Living Flat Lay Food Photography: Raw Vegetables
Want to make veggies look super-fresh? Make this nutritious lighting tutorial one of your five a day.
We all know we should consume more veggies. But if we want to photograph them first, how do we make them look good enough to eat?
In this easy-to-follow food photography class, you’ll learn how to photograph vegetables like a pro and discover how different lighting setups alter the mood and feel of an image.
You’ll watch Karl collaborate with renowned food photographer Anna Pustynnikova as they show you how to style an enticing flat-lay arrangement. As they demonstrate multiple lighting setups, explaining how the position of each light changes the effect, you’ll pick up a range of techniques to improve your food photography.
Even better, you’ll discover how to re-create this stunning image using just one light!
In this class:
- Learn flat lay food photography
- Food photography lighting setup examples
- Lighting modifiers and their effects
- One light food photography setups
- How to enhance texture, colour and shape in food photography
- Selecting backgrounds for food photography
- Food styling tips and tricks
For this food shot, Anna and I wanted to create something that would convey the feeling of a healthy lifestyle image with a rustic setting.
We incorporated a number of different vegetables as we wanted to include a variety of shapes, colours and textures. For the styling of this shot, Anna’s advice was to mix up your colours and pay close attention to the lines and flow of your image. Achieving a balanced image is key if you want to achieve a pleasing final result.
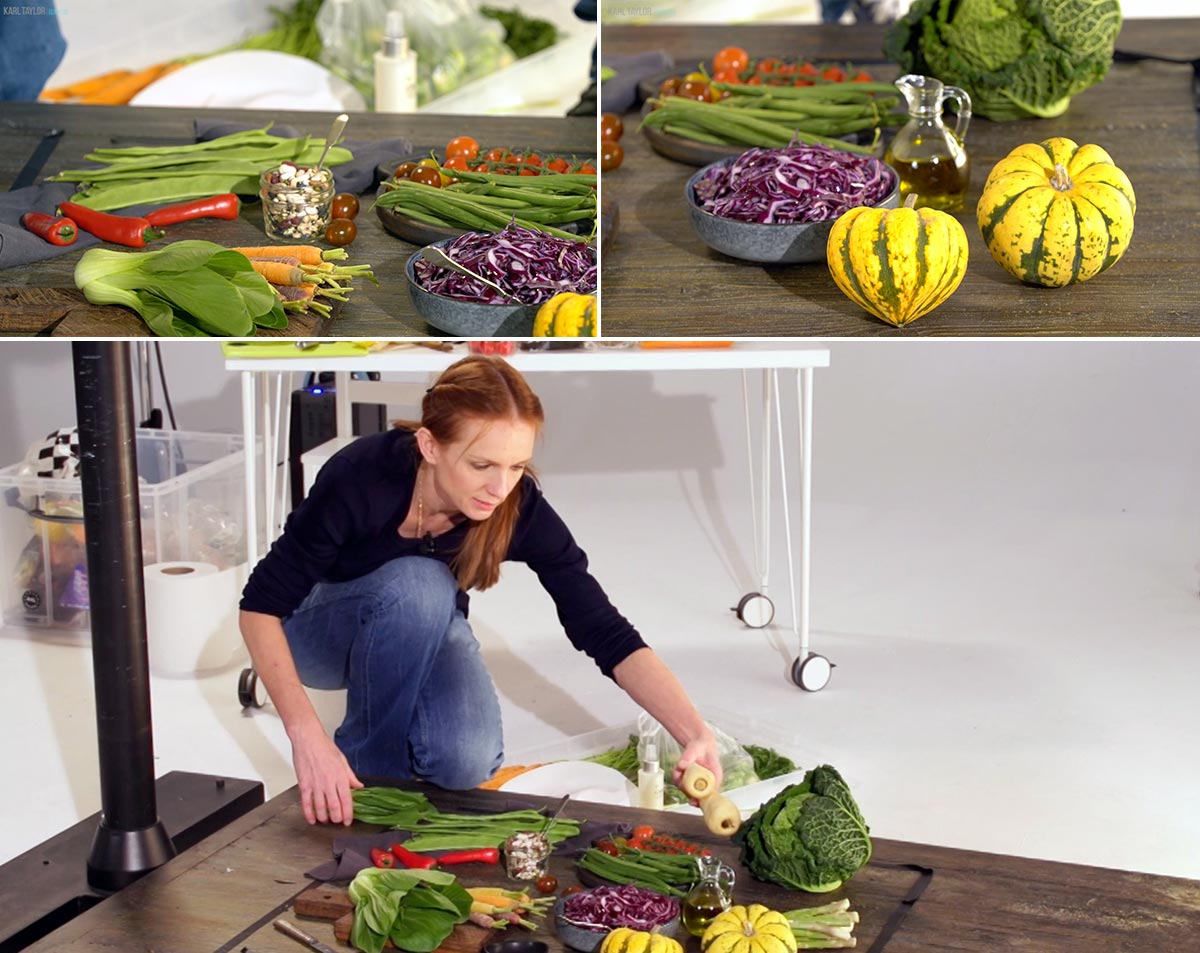
Anna shared her professional food styling tricks.
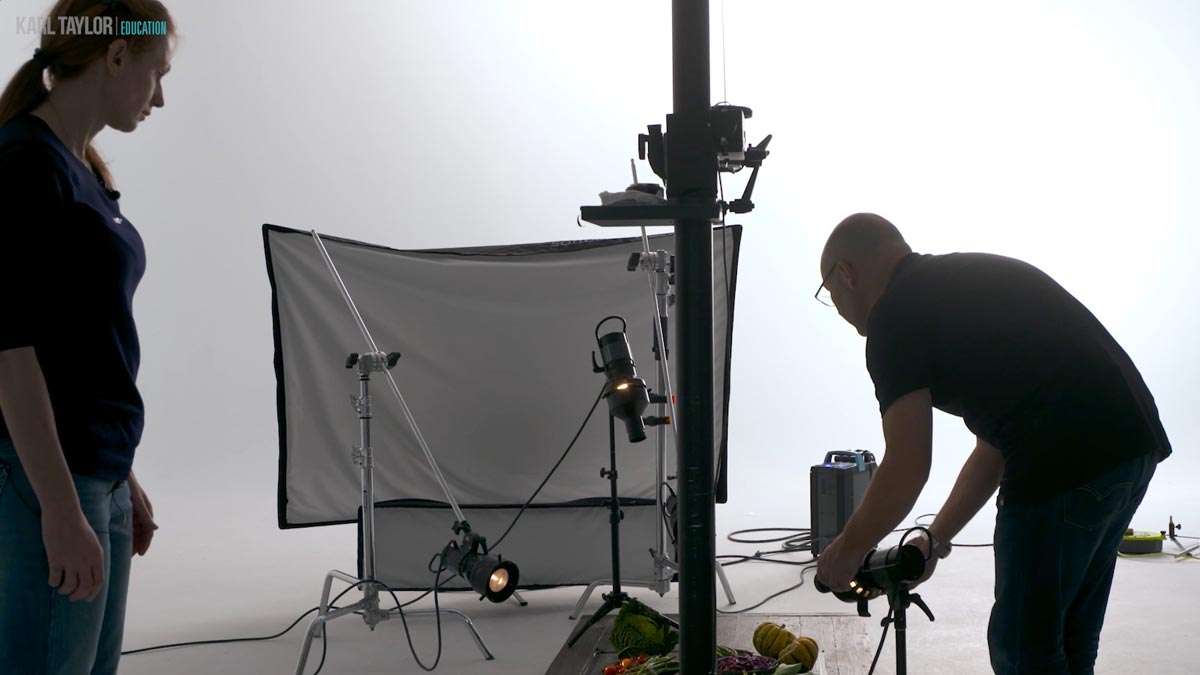
Once the styling was finalised, I experimented with the lighting. My initial lighting setup used two softboxes, placed in a low position to really bring out the texture, and I adjusted the balance of these lights until I achieved the country kitchen style lighting effect I wanted.

Food photography lighting setup using softboxes.
For the second lighting setup I added more directional light to highlight key areas of the shot using picolites with fresnel attachments.
Food photography lighting setup using softboxes and Picolites.
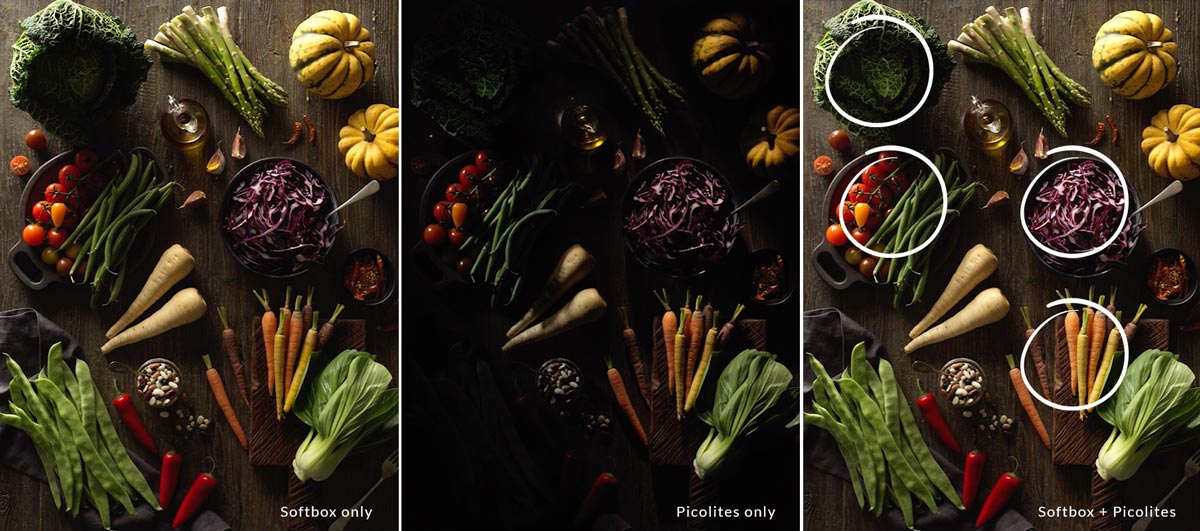
Results from the additional Picolites.
I then switched to a Para 133 to see the difference.
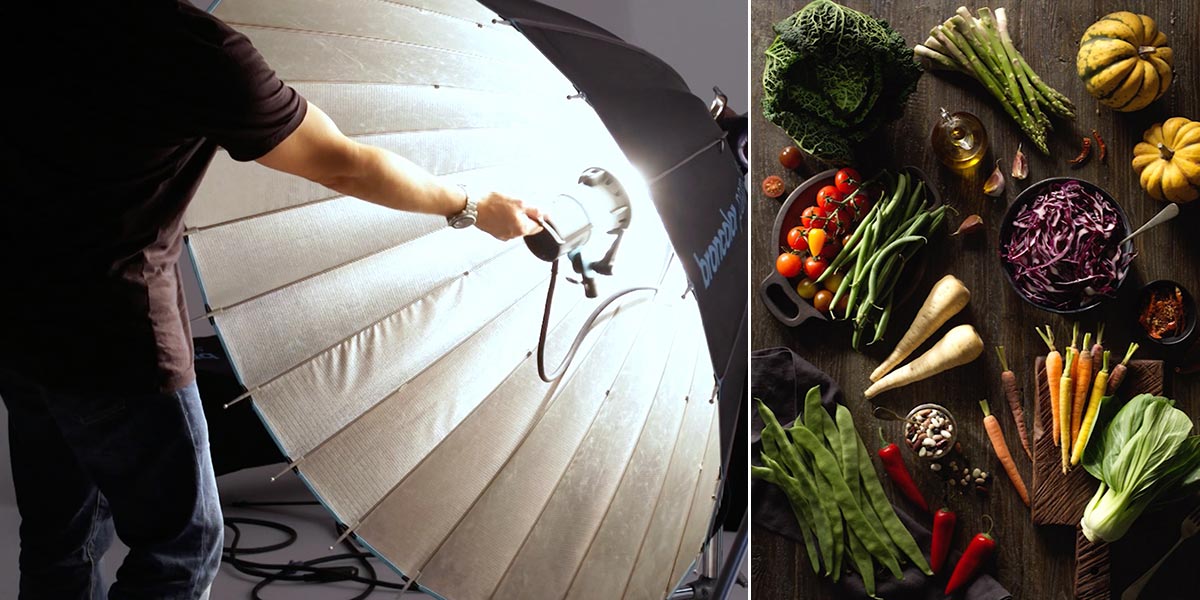
Using a Para 133 for food photography.
Using the Para 133 I then demonstrated how it was possible to get a really good result using just one light. To do this I made use of reflected light to bounce light back into the cabbage, which gave a similar result to what I had achieved by using the Picolites. You can see another example where I do this here.
The final image:

The final fresh vegetable flat lay image.
To learn more about food photography styling, check out Interview With Food Photographer Anna Pustynnikova and Food Photography With Anna Pustynnikova.
If you enjoy this class, be sure to watch Photographing Candy Using Colour Theory, Rustic Food Photography: Roast Beef and Still Life Food Photography: Cup of Tea.
Questions? Please post them in the comments section below.
Comments
Hi, Karl! First of all, thank you for this amazing classe! I have some questions about the comparison of the softboxes and the Para. Both questions about the comparison at 1:06: 05.
1 – If we remove the external bafle of the larger softbox it would be more similar to the light of the para?
2 – It would be an good solution add some grids to the softboxes? Which I think it would prevent the light coming from the softboxes to spread out too much.
Hi and thank you.
1. Yes that would make it more similar in contrast but it would not be exactly the same as they both work in different ways.
2. Adding a grid to the softbox without it’s front diffuser would also help it further as the light becomes more directional.
I would have shot this landscape mode ; why did you choose portrait mode?
There are issues with your website guys because while I was watching this course suddenly the play stopped and restarted at the beginning, I didn’t had my hands on my iPad so that’s an issue with you guys.
Also many times if I don’t always watch the entire courses at once I get your website to not always remember where I was at…
Hi, as I understand it there is a bookmark function that saves where you are in the video? I shot this portrait as to me I think portrait food shots are more useful for stock images, food books etc
Karl I am hesitating in between getting the manfrotto salon 280 or the super salon 280, If I dont plan on shooting cars do you have a recommendation?
What else than cars would you need a 9Ft stand?
Hi, occasionally for other large items such as furniture but not that often.
Wicked lighting seminar.. wicked food styling as well.. but the images produced with the para… honestly, I don’t really do fashion, so I was waffling over the need for a para. But this one seminar totally sold me on using a para with tabletop products.
Hi Gary, a good fresnel lens light is also worth considering as an alternative to a Para for food, essentially a fresnel such as the Flooter is a much more effective version of the Para or I should say that a Para is trying to be a fresnel but in reverse. Both collimate the light but the advantage of the Para is it is much bigger than we can have for Fresnels (except lighthouses) and therefore softer and they are also softer anyway. But if you take a Flooter and put it through a very weak gauze like a weak net curtain it will retain it’s collimated properties but ‘soften’ the light somewhat because of the small amount of diffusion from the net curtain.
I have been looking at fresnels. Just wish I had the cash to get everything lined up. I’ve been looking at LED lights.. fresnels and now some way to connect a para into the mix. I prefer to use strobes but I need to think about video as well. I’m using old, old… really, really old Normans.. I hear you laughing all the way from Guernsey.. but they do work, although ancient tech. They allow me to create.. use my brain to solve things out. With the right turn of events I will have no problem upgrading and jumping into modern equipment. … and yes I still hear you laughing 😉
I don’t think anyone’s laughing. It’s a good gear, old nut good and if it works…? Better that than new knockoff brand if you as me. I have Minipuls C40 in my kit and I’m happy with them as well, so no pressure! Although the Para 133 is awesome =D
Hi Karl. Can the para 133 be replaced by a deep silver umbrella 130cm or 160cm?
Thanks
Hi Marc, yes it can be replaced by one but are you asking if replacing it with a deep silver will give you exactly the same result? If that’s what your asking then I’m afraid the answer is no because it is not the same modifier and every modifier has it’s own characteristics, paras in particular the way they direct light. If you are asking can you still make a good photo by using a deep umbrella instead then the answer is yes you can.
Thank you so much Karl!
Thank you so much for this. I so enjoy watching you work and playing with subtle effects of lighting. I was able to go ahead and use some of the same methods for a flat lay I was shooting…Once again so happy that I found your hands on, no nonsense training just at the right time when I am needing to deliver more professional results to my clients.
Hi Liz, that’s great to hear and thanks for your comments that’s much appreciated. I’m sure there are plenty more that we have for you to enjoy too. I see you’re in Australia which might mean it would be difficult timing for you to join our live shows live but you might enjoy the ‘no nonsense’ approach and they are all available on replay. All the best Karl.
So many great tips~Thank you!
I was wondering about name of the mister/sprayer that Anna was using, and if she was just spraying a mixture of water, oil, or glycerin? If so, can you please tell me the ratio? Thank you!!
Hi Susan, it was just water in this case from a standard misting bottle. She does use glycerine or oil in some of our other classes but I think she painted that on with a brush.
HI karl
Could you tell me what are the brand & model of mono-pod & arm used for your camera
Thanks
Hi, i’ve got a Manfrotto Super Salon. Others to look at are Cambo and Foba.
Hi Karl..great job!…i have two questions?
1) Where is the tutorial about food backdrops you mention in the video?
2) The vegetable in the left corner up…is not a bit dark?
Thanks and please continue this giant effort!
Hi, The video on making the backgrounds should be here in about a month and I guess regarding the vegetable it is personal preference. My choice was to reveal texture and there but not draw attention too much as the main area of interest should be towards the middle of the image.
thanks for this tutorial.. the Anna stylist as usual looks delicate, natural and effortless although behind this looks generally are several hours of work and planning..Karl thanks to explain the different light set up possible specially when you explain how people commonly set the soft box high and tilted ,..this it what I was thinking to do today ,..but obviously the location of the two soft boxes at the near to the food level give the natural mood expected for this photo.
Hi Maria, yes always consider some sort of textural lighting for food, which can still be combined with soft light but then you can choose the balance between them.
Another great tutorial! Thank you for bringing in the para for this as well. I haven’t tried it with my food images yet but this got me really inspired.
Thanks Oksana.
Excellent tutorial with deep explanation of lighting options and great styling tips! Waiting for next tutorials.
Thank you.
Thank you for this tutorial ;)))
Hi Karl and Anna,
loved watching this tutorial a lot. The low angle lighting was very convincing. I’d be happy to know the benefits of grid attachments on the softboxes if any. Thanks
Hi, Thank you. Grid attachments on softbox will stop the light spreading around your studio as much (which in a small studio will increase contrast) and they will also make the light a little harder than without them. They are also useful when you are backlighting a subject to avoid flare into your camera.