


Fashion Photography on Location
Fashion photography often requires elaborate sets and multiple lights, but for this image, Karl shows how it’s possible to create fantastic results using just one light at your local beach.
During the shoot, Karl worked closely with his model and team to create this dramatic fashion image, inspired by the mid-nineteenth century painting ‘Ophelia’, by British artist Sir John Everett Millais. Throughout the class you’ll see his creative process, find out what settings he used and why and what lighting setup he used to capture the final image.
In this class you will learn:
- How to photograph fashion on location
- Inspiration for fashion photography
- Studio lighting for photographing on location
- How to balance natural light and studio flash
- How to work with a team in difficult conditions
If you have any questions about this class, please post in the comment section below.
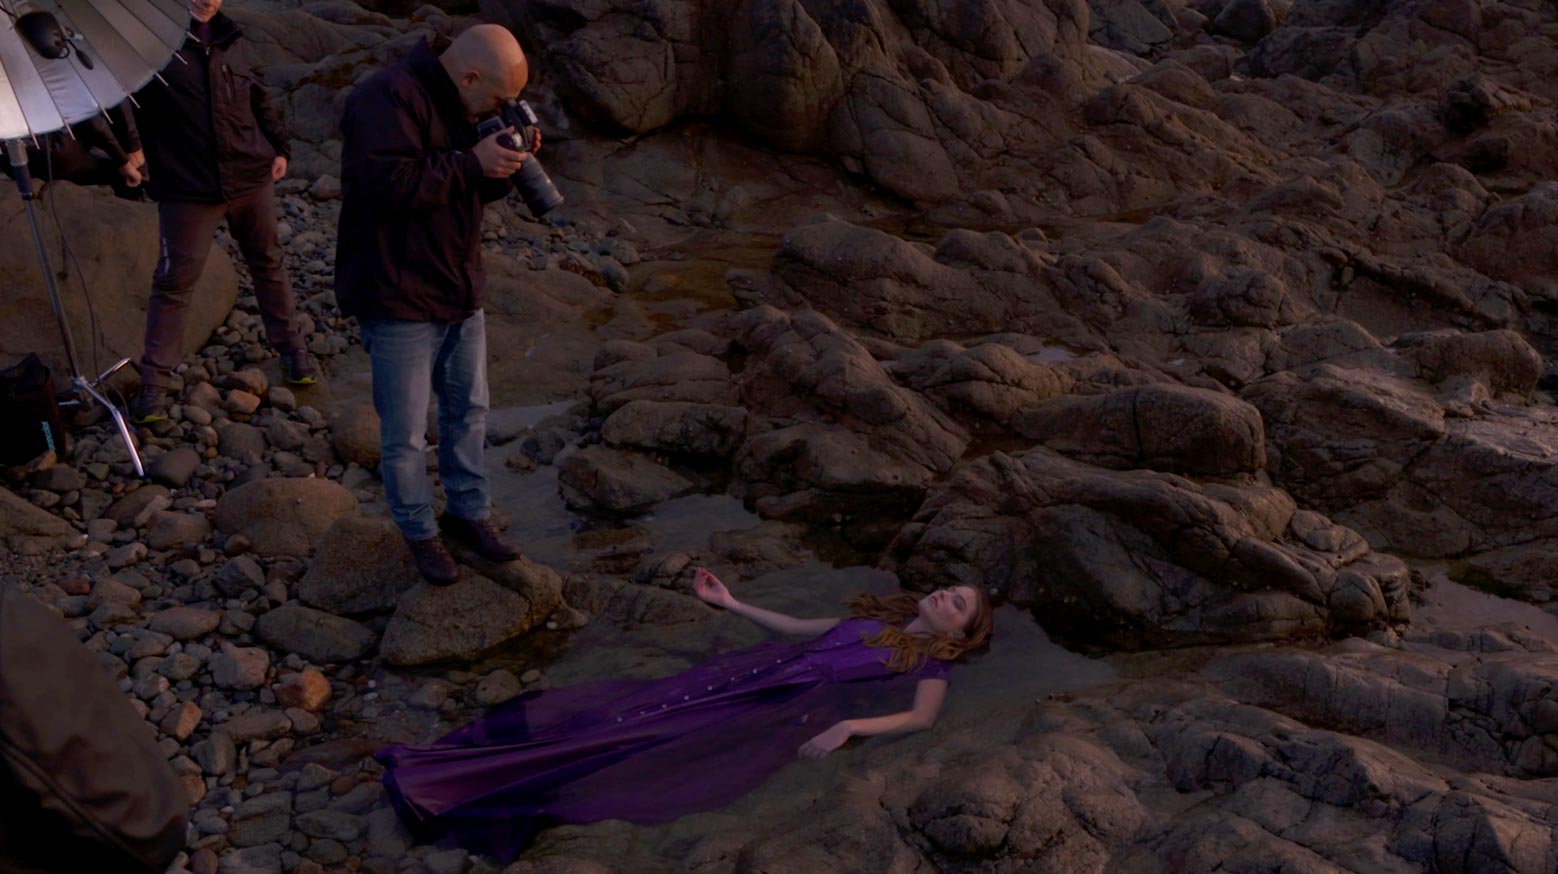
Inspired by Sir John Everett Millais’ painting ‘Ophelia’, I really wanted to create my own image that would capture the same sort of haunting disconnect between the subject and their surrounding.
Working in tough conditions, I knew this wouldn’t be an easy task. It required asking my model to lay in a freezing cold pool of water and holding her pose for some time until I got the final image.
Photographing fashion on location requires a dedicated team.
To make it easier, I asked one of my assistants to stand in while I tested the lighting. I knew I would be using a combination of daylight and flash, but because I really wanted to capture that beautiful twilight atmosphere, I knew I’d have to get the balance exactly right.
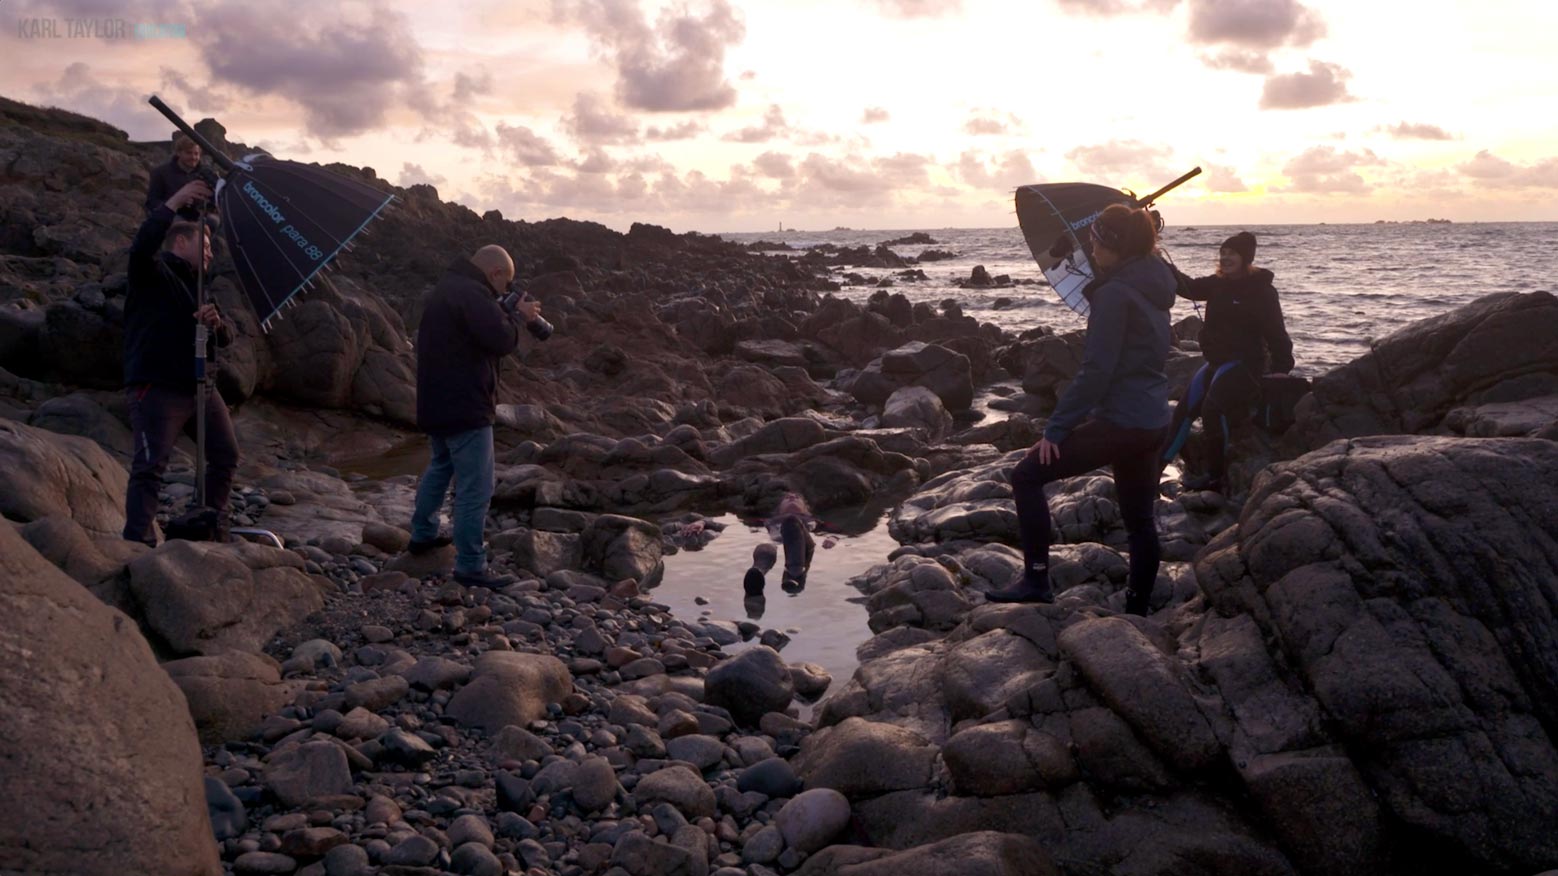
An assistant stood in for the model while testing the lighting.
To start, I tried using two lights, one from behind the subject and one as a subtle fill, but in the end, I decided the single light was best.
The final image required quick thinking and good teamwork, and in the end, I was very pleased with the result.
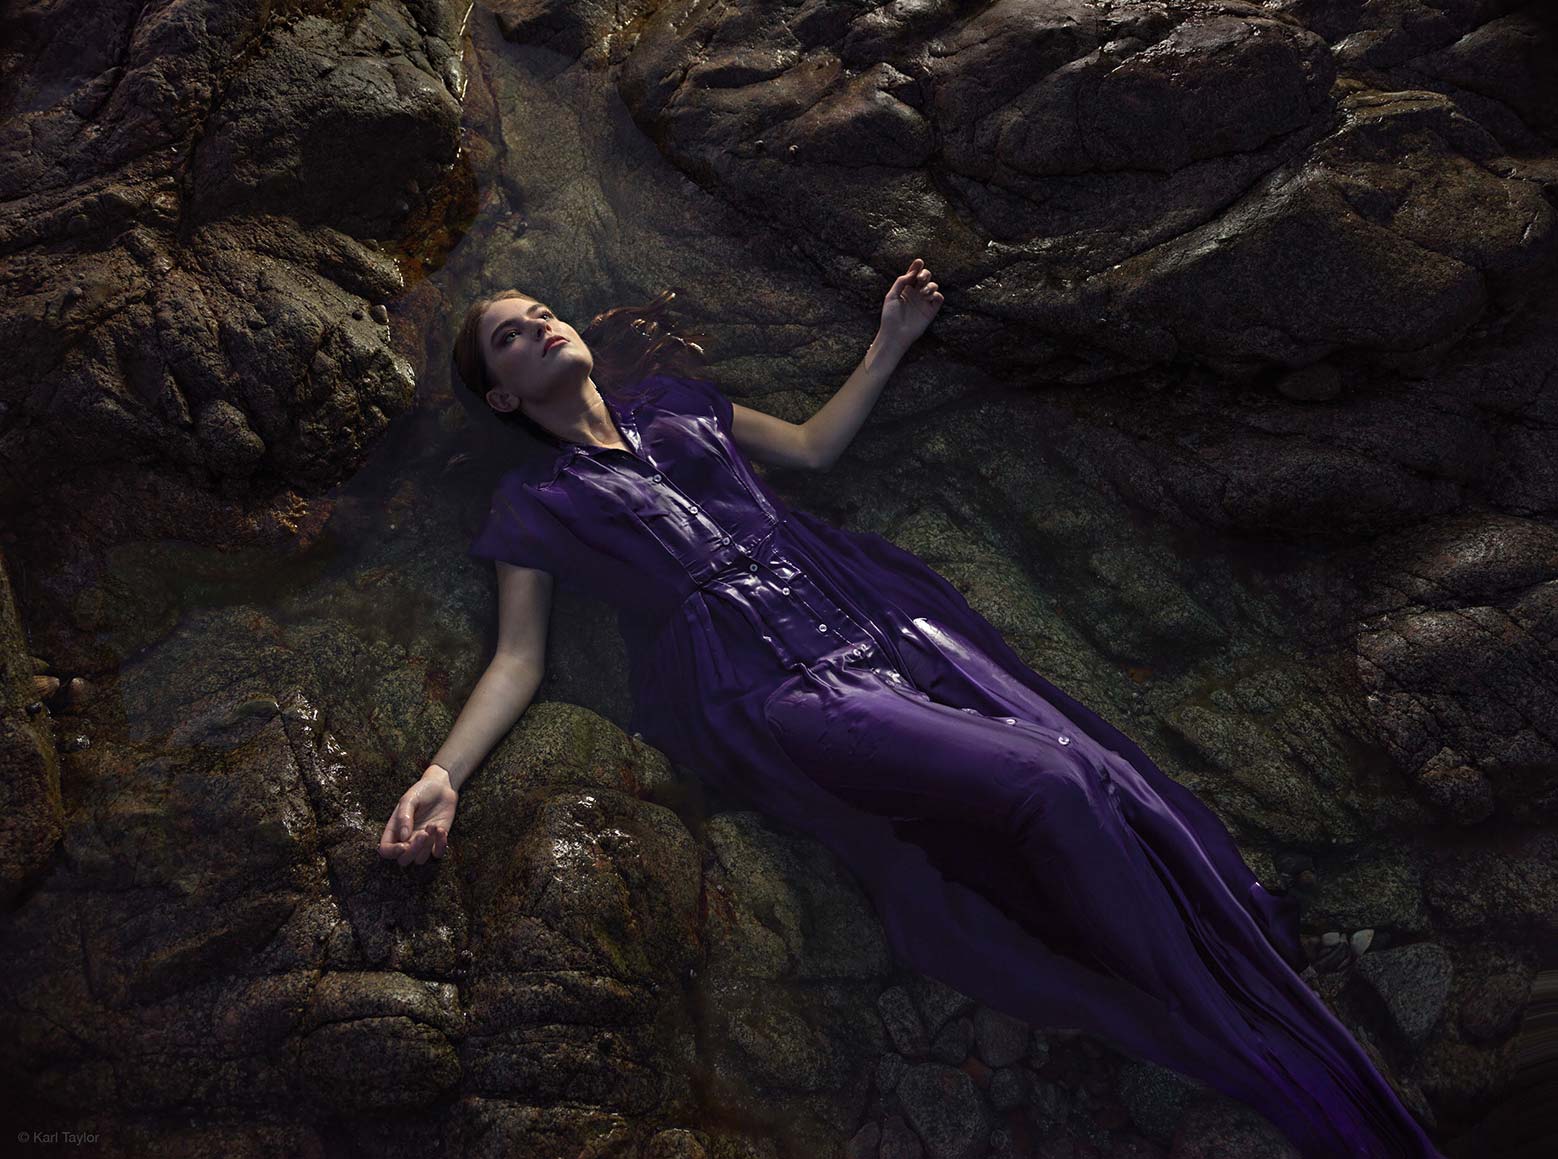
The final fashion image.
Comments
Hi Karl! First off! Lovely shot!
I was just wondering about your shutterspeed being so low. Wouldnt motion blur be an issue here? Or is it here your “flash speed”comes into play? Freezing motion
Great stuff, love your vids.
Kind regards Bjorn
Hi Bjorn, I can’t recall what shutter speed i was shooting at if you could remind me as I couldn’t find it in the video? Regardless though yes most of my light was coming from my flash which would do all the freezing, I would have potentially been using the remaining daylight as a global shadow fill but I would still need to be careful that the speed wasn’t too low. In this shoot though the model is very still, i’m very still so you can actually get away with quite a lot.
Hi Karl and thank you for your lengthy reply.
Yes I was asking regarding the shadow fill. At the end of the video you portray the shot and it says 1/90s. So I was just wondering if this was a confident calculated risk or if you merely depended on the flash freeze in order to freeze it. In regards too that you have some continuous ambient light filling in the shadows. Its just in my own experience shooting exterior portraits around a 1/90s. If I look closely i sometimes have either camera blur or motion blur. And with regards that your model is in water, i was just wondering if that is a calculated risk because that looks like a very fine balance too me.
Again gorgeous shot
Kind regards Bjorn
Hi Bjorn, in a situation like this where the model is in a fixed position and I’m pretty fixed and there is no movement then I’d be happy going as low as 1/50th if I had to. My general rule is to not go lower than the focal length of your lens, so for example 100mm lens don’t go lower than 1/100th etc etc but in this case I was with a wider lens too. I’ve shot hand held at 1/15th with a 20mm on the streets and no problem, see our travel and landscape course in Paris. But my main objective here was just to get enough light into the shadows and not loose the feeling of natural light combined with the flash, if I could have done that at a faster shutter speed then I would have to be safe but necessity required it in these circumstances.
did you need a polarizing filter to cut through the water at all? Or did the flash angle solve the reflection issue
Hi Garrison, no it wasn’t necessary as the angle of the sky light and our flashes weren’t at the angle of reflectance. Just to let you know on most of our classes we have an ‘equipment list’ posted lower down the right of the page which lists all of the kit used on each shoot. Cheers Karl.
Which Camera did you used?
Hi, This was a Hasselblad H6 but similar results could be achieved with any good 35mm Full Frame camera.
That was amazing! The soft gradation of light you achieved is beautiful! I really struggle with the light/shadow part of using studio lights…meaning my light is always to harsh and my shadows to deep. (I know there is a lot more to it than that, but that’s generally the gist of my struggle) and watching how specific you are with your lighting has made me slow down and think about what I’m doing… Thank you- I am really enjoying every single one of these shows.
Hi Karl,
Amazing photo ! What is the main advantage of using a para for this shot ? Are there other light modifiers that could do the job too ?
Kind regards, Luc
Hi Thanks Luc, the main advantage of Paras is that the light is collimated which also means it can travel further more accurately defined to a particular area and because of it’s angle of incidence to the subject it forms a particularly attractive looking light with very 3 dimensional characteristics on the subject. – See my recent youtube video for a good explanation on Paras – https://www.youtube.com/watch?v=femBzU9-hXI – I also explain in the video alternatives that can be used to good effect and refer to the courses that you can find them.