


Creative Portrait Lighting Techniques (Part 2)
Watch a pro photographer capture creative portraits in real time.
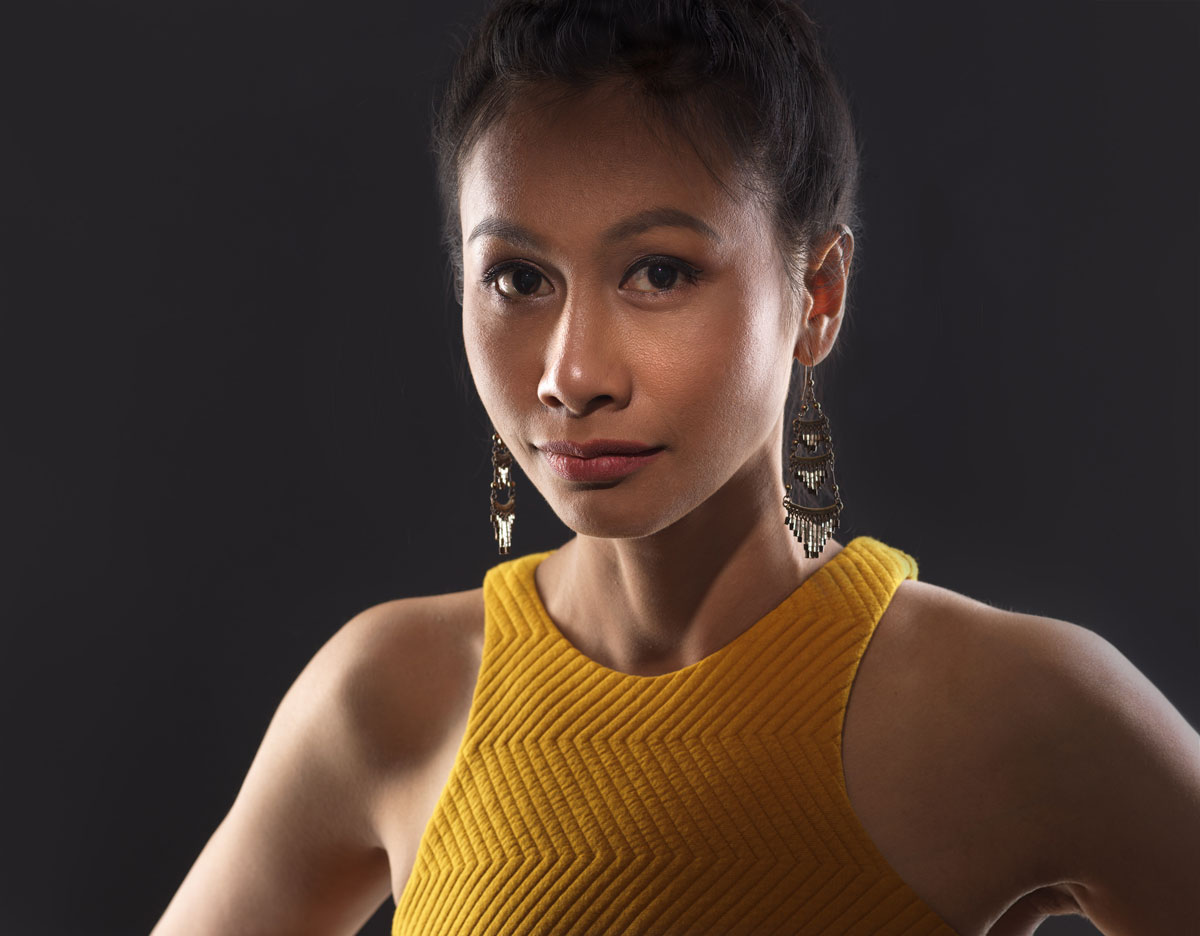
In this photography workshop, Karl Taylor demonstrates two more creative portrait lighting techniques (if you missed part one, you can watch it here).
In this show Karl focuses on portrait lighting, demonstrating two creative setups. The first, a high key portrait with strong contrast, demonstrates how to use backlighting for creative effect while also controlling flare and highlights. You’ll also see how to use reflectors and other techniques to further control your light.
The second portrait, which is more of a classic beauty lighting style, uses just two softboxes to create a lovely, soft light. Karl demonstrates how to control edge lighting, apply the inverse square law to control the light on your background and change the hardness or softness of the light.
In this workshop:
- Portrait lighting techniques
- Two light portrait lighting setup
- How to use backlighting for creative effect
- How to create a white background
- How to control flare
- The inverse square law
- How to control light on your background
If you missed part one of this workshop, where Karl demonstrated how to create a Hollywood-style black and white portrait, you can watch it on replay here.
If you have any questions about this show, please use the comment section below.
Comments
Please correct me if I am wrong, but would a simple way of learning and understand “soft vs hard” lighting would be >> the HARDEST light would be the “smallest direct light source” from your talents perspective, as the SOFTEST light would be the “biggest light source” from your talents perspective. Correct?
That is correct and it is covered in greater depth in this class -https://visualeducation.com/class/introduction-and-understanding-light/ it was also covered in this chapter from 12 years ago which is still very popular today – https://visualeducation.com/class/understanding-light/
Love these online classes. Maybe next year work with a model.
Had an idea when you were working on the details with the window mask. You brought in the extra side bits. Very interesting. My idea was in essence creating a window mask tunnel. I think the film industry uses tapered bellows type hoods attached to a camera frame structure rather than attached to the camera. But for studio work it might be useful to create something like that. In terms of cost, hard to beat a bit of foam board with a DIY cut out hole, yet it might be easier to make and not require a high tech purchase and they might suck up a bit more of the flair.
Hi Gary, yes something similar already exists – here’s one that LEE make: https://www.bhphotovideo.com/c/product/292623-REG/LEE_Filters_MWH_Lens_Hood_Medium_Wide.html
Karl.. I know these shows focus on the lighting and solving the problems involved in creating situations, but I have a little request as some point which would be quite informative for someone with my history. I would love to work with models but I do not have much history working with experienced models. I would be grateful to understand the perspective of the model in what they work to achieve. I realize the photographer generally asks the model to do certain things… stand, pose, run, jump, etc… and they do their best to produce what you ask. I guess it is important to understand the considerations you should be aware of as a photographer, that the model is working to achieve. Not even sure how to frame this question because I just have so little experience working with models, but I would like to in the future.
Hi Gary, this is why I like to have a clear pre-viz or my own brief for the shots I’m trying to produce. That way I can run through these with the model in advance and it gets them onboard and involved in the project and I usually find provides better results. If the shoot has a theme or style then you can get the model onboard with that, essentially a model is an actor and helping them understand the script rather than just reading lines works best for me.
Hi Karl,
What’s the best way to make a Window Mask?
Hi Mark, black foam board and a stanley knife and a metal ruler. Work out your camera format shape, for example 35mm is 24x36mm multiply by 10 = window mask 360mm x 240mm which may be too big for some occassions so make a smaller one too at the same ration so 360mm and 240mm divided by two = 180mm x 120mm.
Thanks Karl!
Hi Karl & KTE Team
And thanks to Kryn question the penny just dropped for me too, I think.
Yes, Karl if B your model had been a little further back, in that blackened puppet booth you & Ash had built around her, then more of the stronger back-lighting would have had the chance to wrap around her more, yes ?
But all said & done the stuff your trying to do in 75 or so minutes, a class, to a brief, live Q& A’s, Crew instruction, Creating on the fly …..Whoa! a show well done, man.
Again thanks to you all, for another gripping studio lighting control, photography lesson.
Hi John, yes that’s correct and thank you had been a long day before this one!
So i’m confused….
You want a pure white background 255. you get it there with a little flare. then you take it about 3 stops over to introduce flare. then you try your best to block out flare…. why did you introduce flare if only to block it out??
Hi Tiaan, flare and exposure are different, I wanted overexposure around the skin which can be created by going beyond pure white on my background but I didn’t want all of the flare in the lens that it would create. Flare reduces contrast and if not controlled can spoil the picture, in some images though a controlled amount of flare can be effective in creating mood.
Hi Karl, about the window mask, and considering the small distance it is from the lens, I think you could easily build a rig where the window would be fixed to the camera (to the tripod mount for example?) by doing so you could be free of your movement and compose your shot more easily, what do you think?
Hi Quentin, yes absolutely if you can rig that up reasonably easily, but do consider that the size of the mask and the distance will be dependent on the shoot and lighting positions so whilst good for one shoot it could be different for the next.
Hi Karl,
Great video lessons you make. You teach me a lot, thanks for that. Can you please tell me (us) a little bit more about the whitebalance you use during your shoots. I don’t see you measuring that, probably due tot your experience.
Thanks and i will now continue watching … Ron.
Hi I pretty much shoot everything at flash white balance or daylight and then adjust the raw file later.
why not use v-flats that are black to block light ?
Hi Morten yes V-flats are a good option but they are not as tall, however if you can put a lid across the top you’ll be fine. Black velvet though has the best light absorbing quality.
Sorry I was referring to the first set up. Thanks again
What would be the difference if you put grids over the strip lights on the side? Thank you
Hi Aby, in this instance and at this close distance the grids wouldn’t have much effect on the light at all but they would help prevent flare in the camera. The main mistake I made here with this set up though under the stress of shooting live was having my model too far forwards in the black box, if she was further back there would have been more light wrapping around her from the background. But hey this is the first live show where it didn’t go exactly as I would have preferred!
Hey Karl,
Question for you. Looking at how you add more lights to reflect off the edge of the model’s skin, since you now effectively replace the wraparound of the overexposed background with two lights, wouldn’t it be easier to drop the background to just below 255, such that you don’t have flare and spillage coming from the background lighting? That also allows you to remove the cloths and the “lens hood” board.
Or is there another reason you’re specifically using this approach?
Hi Kryn, yes that is exactly right but my problem was under the stress of shooting live and wanting to get two shoots in I made the error of having the model too far forwards in the black box, if she was further back there would have been more light wrapping around her from the background alone which is the effect I wanted, but they can’t all go perfect, this is the first live show where something didn’t quite go as planned, I should have just stopped and applied the physics but I was too conscious of time and getting the second shoot in!