


Clinique Post-Production 3: Adding Water Splash
In this class, which forms part of the post-production process for the Clinique style advertising image, Karl explains his thought process for the splash element of the image and demonstrates how he combines it with his group shot.
One of the challenges Karl has to overcome in this part of the retouching process is achieving the right tone and colour of the water splash. Shot against a white background, the original water splash is quite low contrast so Karl uses a combination of highlight recovery, levels adjustments and hue/saturation adjustments. You’ll see each stage as he reveals the water splash, increases the tonal definition and adds a sense of freshness by adjusting the saturation levels.
In this class:
- Combining a splash shot with a product image
- How to combine splash shot with product group shot
- How to use masks to reveal parts of the splash shot
- How to use levels to increase contrast in water
- How to use saturation adjustments to correct colour and add freshness
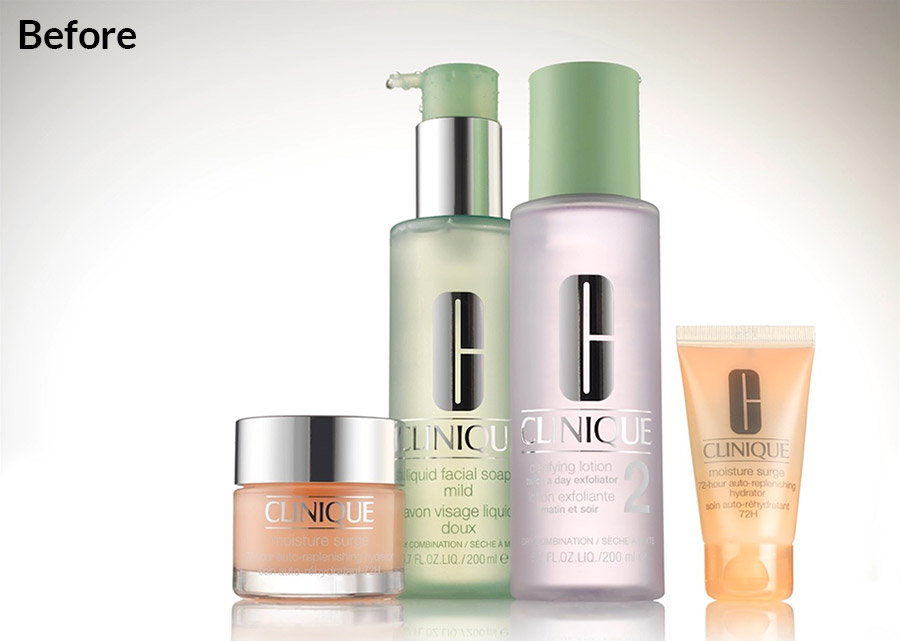
The Clinique products before adding the water splash.
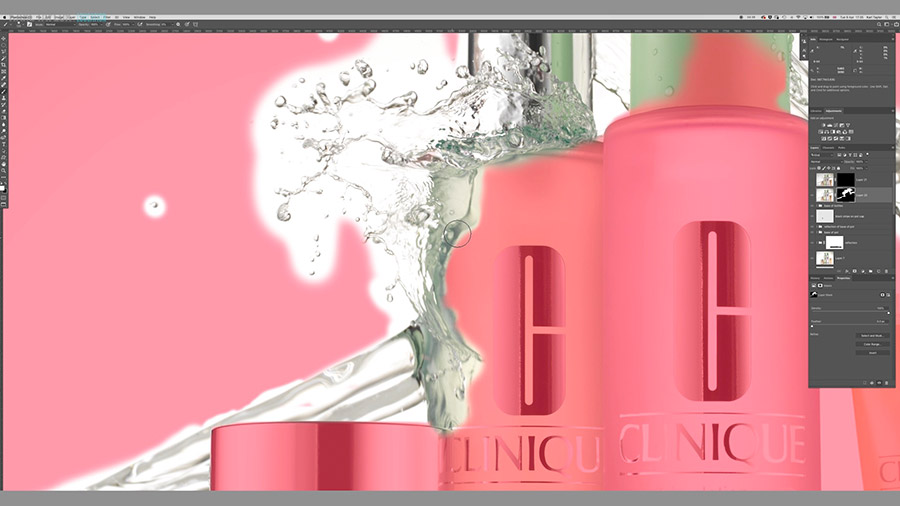
Using masks to add the water splash shots.
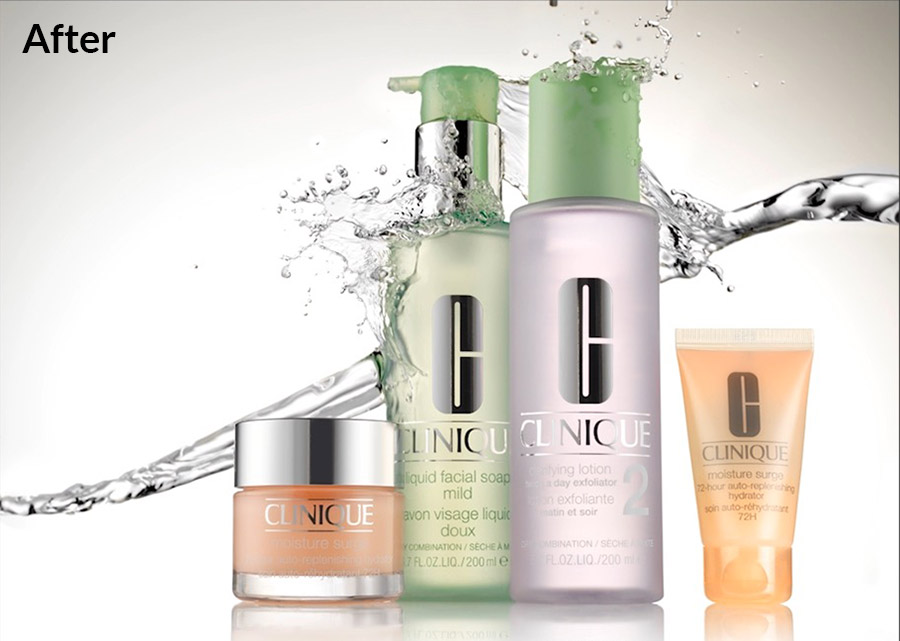
The splash shot with increased contrast and colour correction.
To see how this image was shot, watch the Clinique Style Advertising Shoot classes.
For further classes on splash shots and the post-production process, you may enjoy our Floating Cosmetics Splash Shot and the corresponding post-production class.
Questions? Please post them in the comments section below.
Comments
hi, I saw you used the normal image of the splash and the HIGHLIGHT RECOVERY image as well , then you revealed the HIGHLIGHT RECOVERY image , so in that case why you didn’t use only the HIGHLIGHT RECOVERY image instead of both images? won’t be the same result? thanks:)
Hi Peter, I can’t remember off the top of my head. If you can provide me with the time stamp from the video then I can take a look to remind myself.
hi Karl, at the minute 2:40, you started to do the HIGHLIGHT RECOVERY on the COPY image …then you started working on the other regular image that has NO HIGHLIGHT RECOVERY…then at the minute 9:40 you started applying the COPY image with the HIGHLIGHT RECOVERY to reveal more the definition of the splash.
so I was wondering what will be the difference if you use the COPY image with the HIGHLIGHT RECOVERY right away from the begin? won’t be the same result and saving time? thanks
Hi Peter, no unfortunately it won’t because when you use ‘highlight recovery’ although it primarily recovers highlights, it will also affect some other tones that are close to highlights but are tones that you didn’t want affected. This is why I would have kept the other layer so I only needed to mask in the highlight recovered areas only and not affect the other areas.
Amazing process so far Karl.
Thanks Geoff