
Rustic Food Photography: Feta Cheese
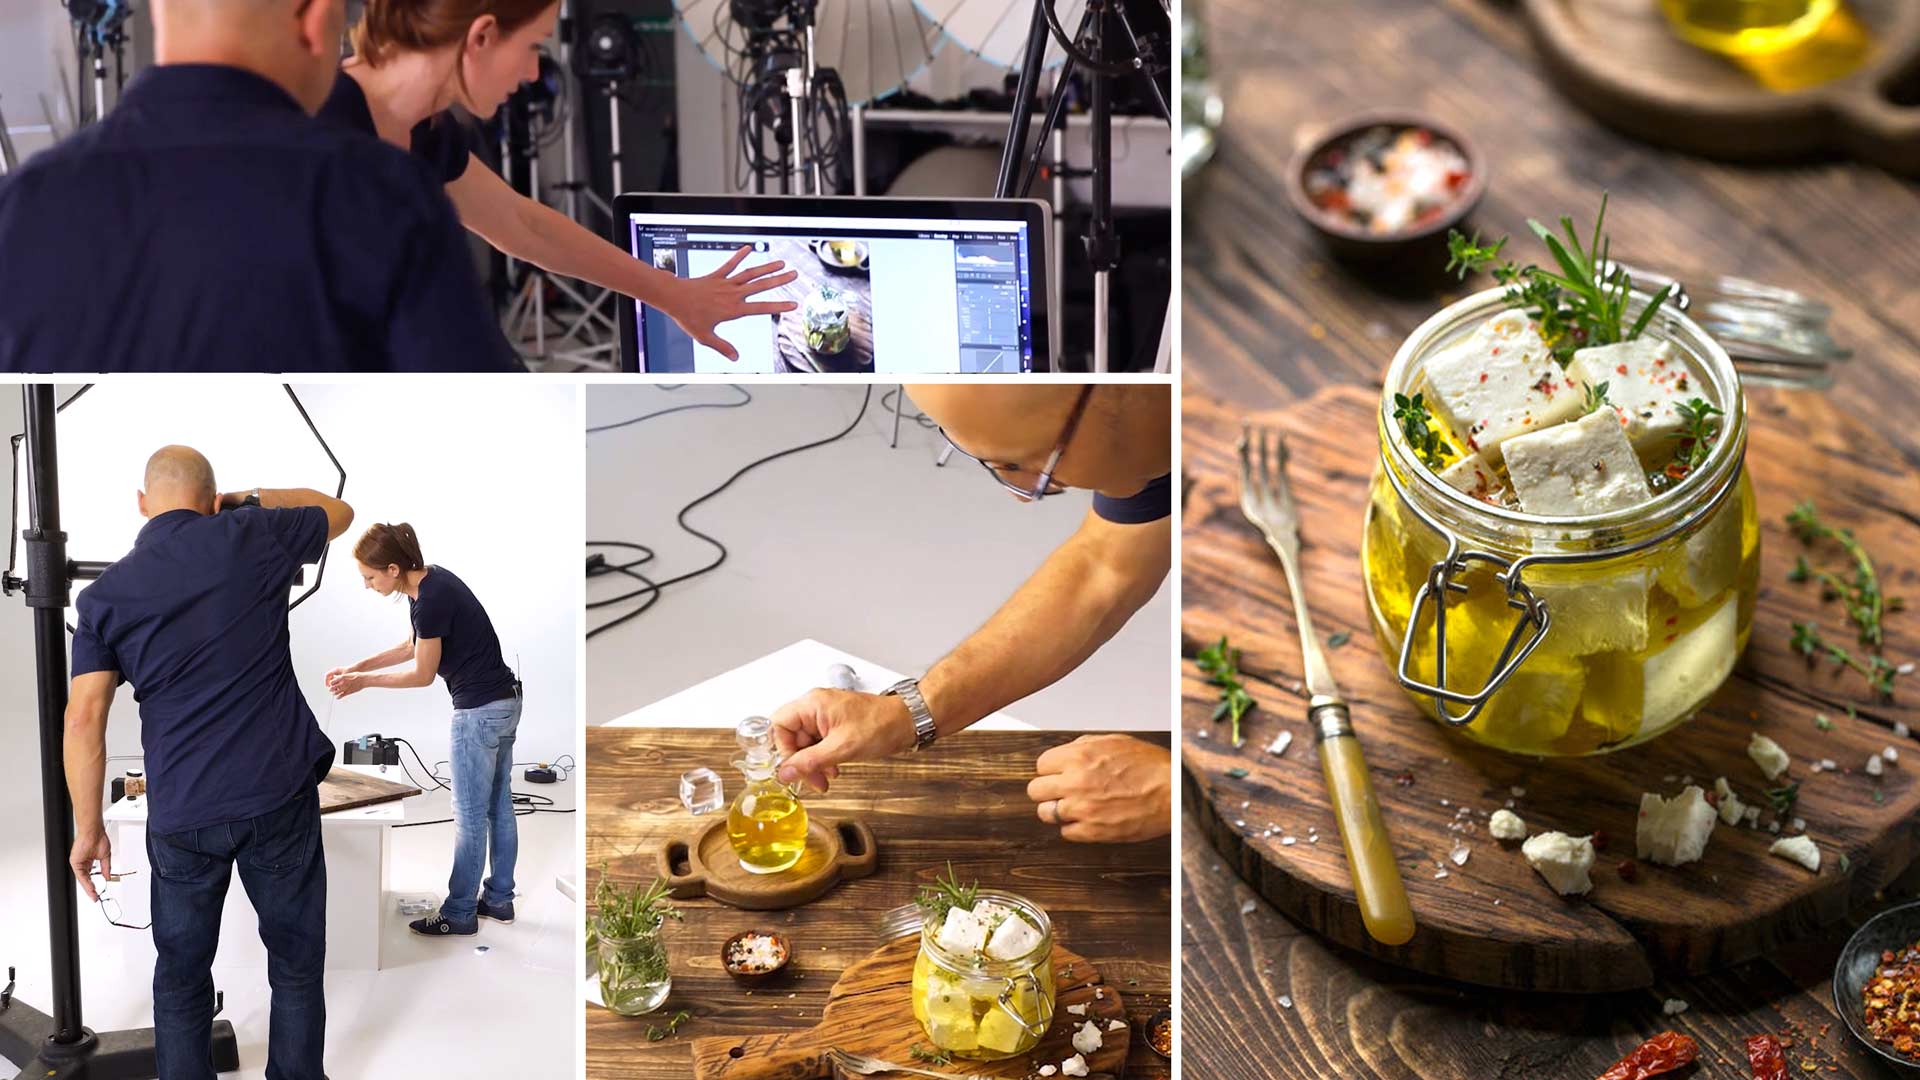
A jar of feta cheese is the focus of Karl and Anna’s next shot as, together, they demonstrate essential preparation, styling and lighting techniques for eye-catching food photography.
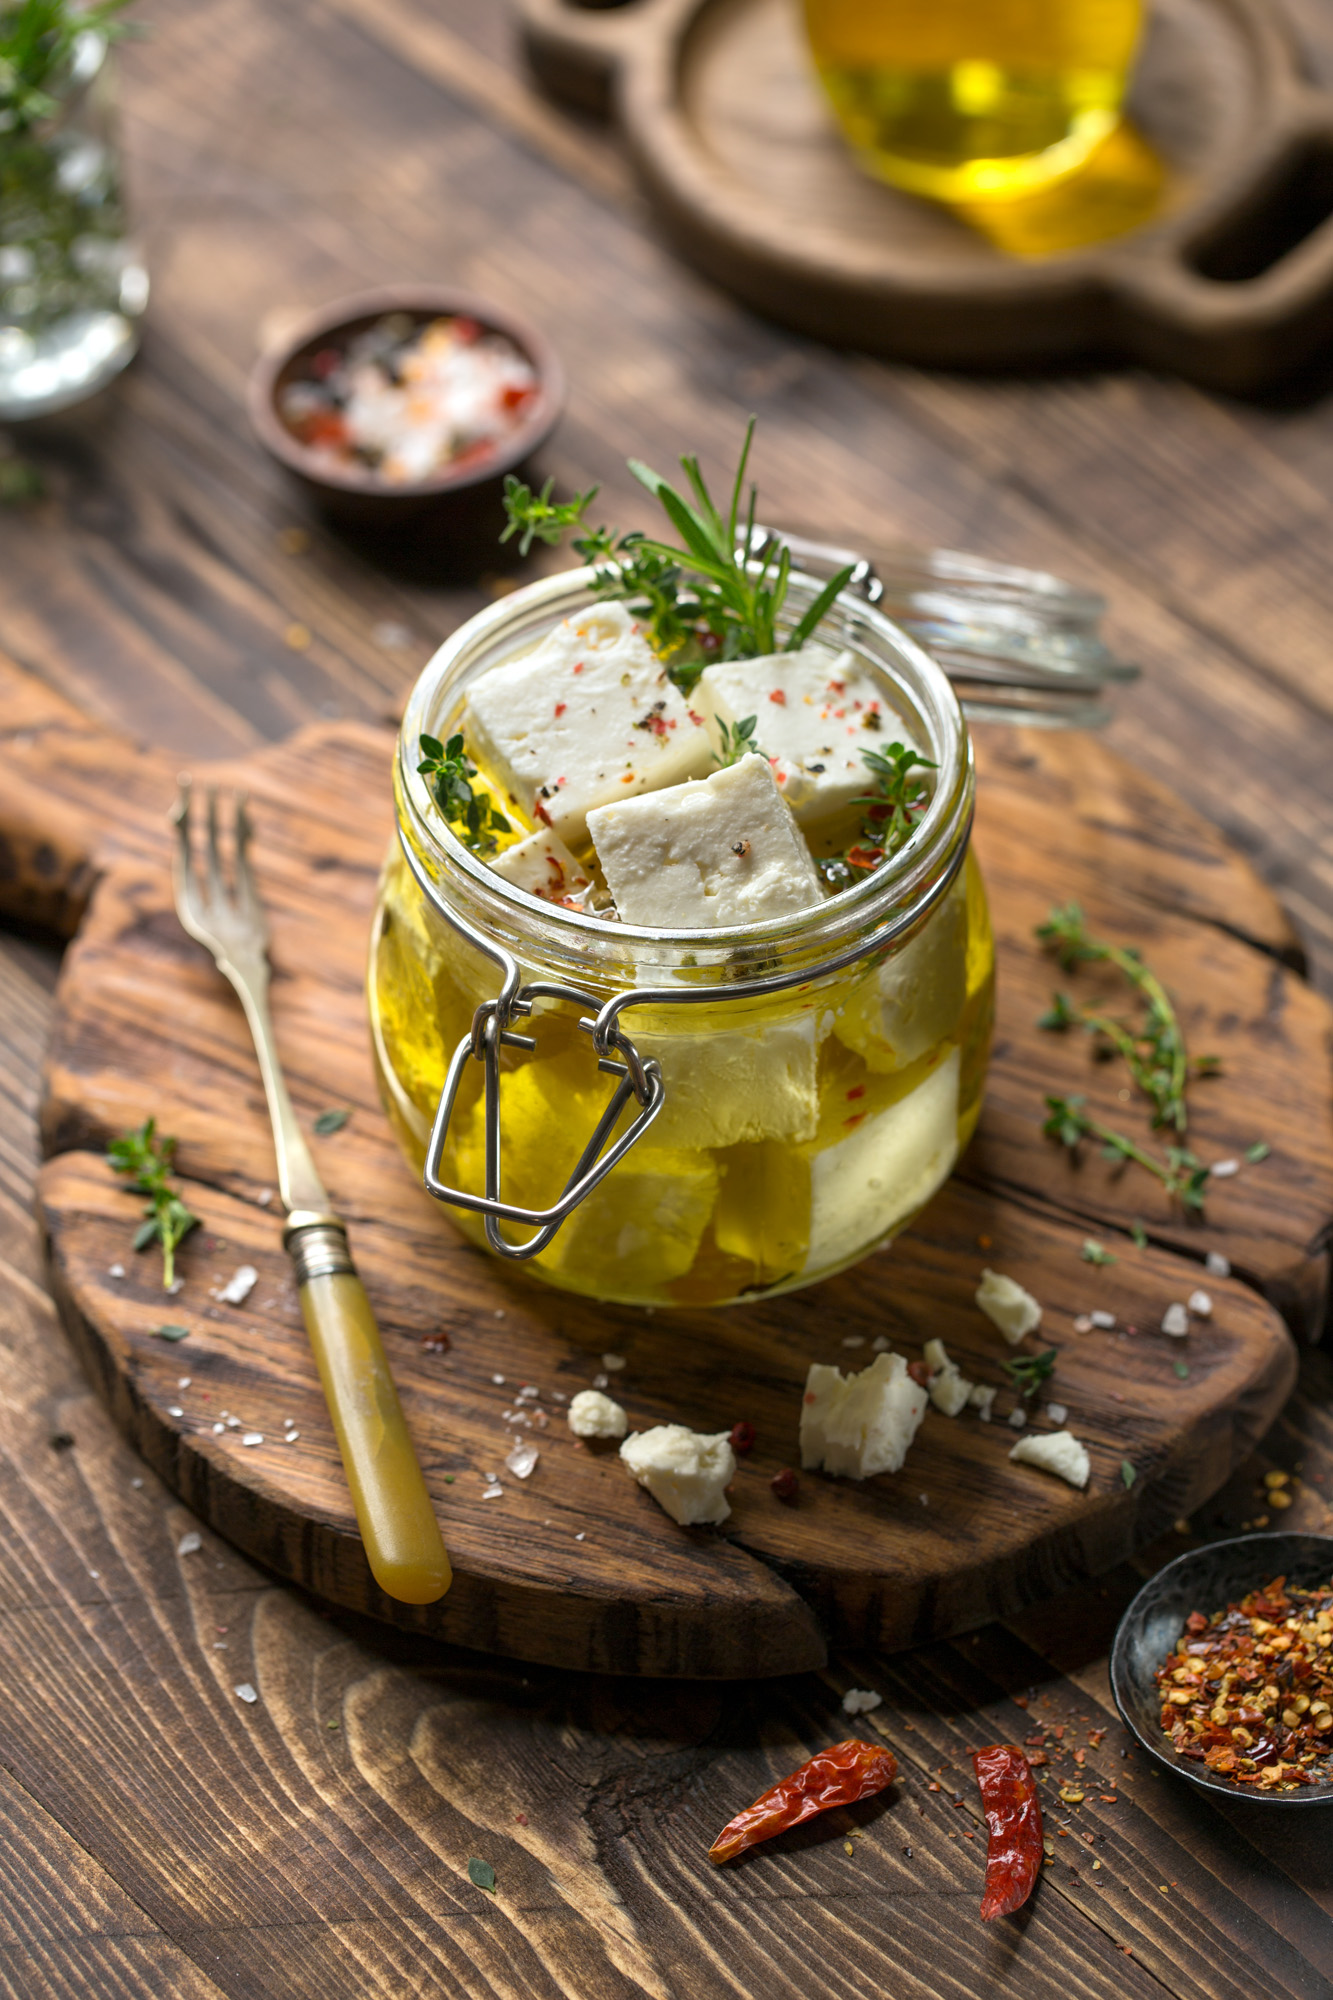
For this next food photography class, Anna decides she wants to create a rustic looking arrangement of marinated feta cheese with herbs and spices. She demonstrates and explains key styling techniques, revealing one of her go-to props, while Karl, using just one light, works on achieving the bright, fresh lighting that brings this shot to life.
In this photography class we cover the following:
- Using directional lighting to highlight texture
- Sourcing affordable props
- How to balance color for best effect
- Considering the effect different shapes have on an image
- Using reflectors and flags
- How light positioning can change contrast
- Softbox vs Para 133 – the effects of each
Comments
Hi there Karl.
I’m got a bit confused at the end of this photoshoot when you moved the 150 octabox further away to increase contrast.
On the candy photoshoot as you explained the barebuld was further away so you could have a more even illumination across the MDF boards due to light fall off which i would expect.
On the cheese board photoshoot when you switched (23min)the picobox to the small softbox you moved the softbox further away losing contrast and drama because of the light fall off becoming more even as you said, which is what I would except as well.
Is it correct to say that in this specific photoshoot the increased contrast has nothing to do with light fall off ( since further away it would be more even )but only that the light isn’t able to reach certain areas and the light is so big that makes the light fall off somewhat negligible?
Thanks again for yout time.
Hi, the points you raise are absolutely correct and valid when it comes to light fall off due to the inverse square law but in the case of the barebulb lights they bounce more around the studio than a softbox and they don’t change much in apparent size from the subjects perspective, they essentially remain a point light source. If I mentioned increasing contrast by moving an Octabox 150 further away I can only guess that I was trying to decrease its size relative to the subject dramatically to make the light harder but I would have to check the video to confirm.
Yes, you mentioned moving it further away to decrease it’s size relative to the subject as you replied and it did increased the contrast.
I was thing in terms of ” the rule is – to get more contrast – move it closer to achieve faster fall off”. I gues it’s ok but not all there is to it correct?
I should be thinking more like this?
1. Faster fall off generally produces higher contrast.
2. Further away might as well if you are getting more shadows, denser ones in your composition due to number of objects, different heights…and so on
If you had made the oppsoite ( move the octabox very very close ) faster fall off would have been achieved but not necessarily higher contrast since the light is emcopassing such a broad area relative to the subject that the shadows start to get filled?
The general inverse square law confused me a bit, my first reaction would have been to move it closer.
Thanks once again for your time and the prompt responde.
Hi, yes everything you said here is correct and shows you are getting a good grasp of understanding the physics of light. The type of room your are shooting in also plays a big part.
Hey Karl.. the spread of props at the beginning of the video.. is that most of the props you use in the studio for still life or food? Or is that just scratching the surface? There were maybe 4-5 cutting boards, 4-5 knives, serving spoons, cutery.. that sort of thing.. and on and on. Four to five of anything in some variety, will that get you through generally? Food photography seems to open pandora’s box on collecting a never ending pile of props. Obviously, as a professional studio you will do food, but it is just part of the mix of services, and not your specialty.
Hi Gary, this was just a selection of some of Anna’s favourite props that she brought with her. She has a greater collection than this but most of it is inexpensive and from second hand stores etc. I have much less of a selection of props and I normally source what I need based on a brief but if you plan to shoot food regularly then a good selection of probs and surfaces would make sense.
Yeah… the time and investment in collecting props.. and I don’t really mean money per se, kind of frightens me from this area. It seems like a vocation unto itself.
Hi Gary, I think you’d be surprised what a couple of half days spent would turn up. A few second hand stores, antique fairs, car boot sales etc and you can acquire quite a few useful things. Charity shops are also a great source of interesting stuff.
I’ve built a pretty decent collection of glassware for wine, beer and cocktail shots from 2nd hand stores nearby. Amazing what you can find for a dollar or two. I buy very few things at full cost. Cutting boards are hard to find, but true.. you just keep looking.. it is out there.
Dear Karl, I liked very much this tutorial video. Since I started my photography journey you were my online teacher via youtube and all. I would like to share a photo what I have learned from this tutorial.
Hi Safarud, thank you but I’m afraid you will have to wait until our next food critique or suitable competition or if you are in our mentor plan as we are unable to take submissions at any other time
Thank you Karl for the videos.
I just don’t understand why did toy use flash when you had the beautiful continues big light?
Thank you
Hi, there is no continuous light. You need to understand how studio flashes work. Please watch this chapter https://visualeducation.com/class/types-of-studio-lighting/
All your tutorials have been absolutely fantastic for me, I can’t believe how much I have learned from your site so far. I would be lost without them! That’s great you will hopefully get Anna back for some more tutorials, you can tell her she has a fan 🙂
Hi Karl
My ambition is to become a product photographer, in particular the food industry as I am also a very good cook. I just wanted to say I am loving these tutorials. I bought a job lot of old cutlery for £8 online and today I received it only to find the exact same fork as the one you used in this tutorial! Needless to say I am very pleased and I’m taking the fork as a sign I that this line of photography is definitely for me 🙂
Kindest regards
Ali
Ha great stuff Ali, as Anna said you can pick up all sorts of props like this online. Good luck with your food photography, I thoroughly enjoyed it and am looking to get Anna back for some more tutorials.
Amazing Karl, I definitively believe that I made the best investment in my life.
Thank you Nelson. Enjoy!
Hi Karl! Great tutorial! The only two things I can’t understand- the feta cheese is slightly out of focus -was it made intentionally? And also – how to decide right dof? Is it just your own feeling or are there any stict rules (like -your central object should be in focus, or just part of it)? To tell the truth I don’t like when main subject is out of focus or only small portion of it in focus-for me it looks like a mistake. But I think you should know the rules better then me since product photography is you main directioin, so how it should be?
Hi Anna,
1. the cheese is sharp, see here http://karltaylorportfolio.com/objects/dqekj6ucsynxqu0284zczwwbtyfru6
2. DOF based on personal preference
3. Most product photography is larger DOF as you will see in other examples on my website above.
Really enjoying this series Anya and Karl. The Para really does give that extra natural sparkle. I would be curious to see what the focus 130 umbrella would look like fully de focused, being as it is a more economical modifier.
Thank you so much for you reply Karl 🙂
Hi Karl. Could I know how much I should be charged with a photo like this? For example, if I did it for a magazine …
Hi Micaela, that’s a very open question as it depends largely on which magazine etc etc. Visit our business course and the section on pricing. Most commercial photographers work on a day rate or half day rate for producing images for clients so that course will give you the price range. If you are looking to only license the image once to them and then keep it then that is very different and you need to look at stock libraries like getty, Istock etc to get an idea of what they are charging for licensed images.
I love this video! Thank you Karl to let me know all your lighting tricks. I am learning so much. Anya, thank you too. This is the best course I have ever attended.
Thank you Micaela for your kind words, of course it is great for us to get such feedback. Please tell your friends so we can grow our community and bring you even more! 🙂