


Strong, Bold and Dynamic
Fortune favours the bold in this step-by-step class.
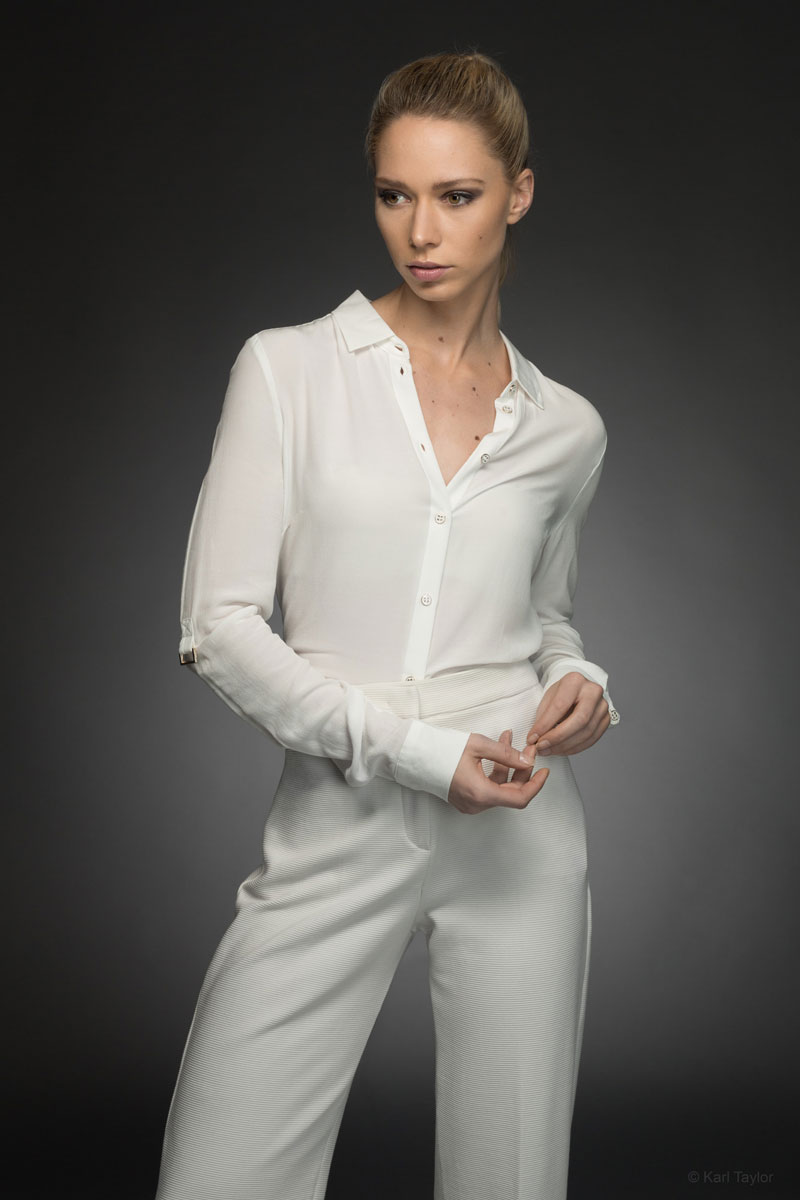
This is a simple yet versatile studio lighting setup suitable for eye-catching fashion and portrait images.
In this photography class, Karl captures this stunning three-quarter-length image using just three lights with basic modifiers. Modifying the setup from the previous photography class, Karl explains exactly what to consider for this shoot, including power ratios and outfit choices.
In this class:
- Studio Lighting: How to set up multiple studio lights
- Three light setup for creative portrait photography
- Lighting setups for three quarter length images
- Studio Lighting: Understanding power ratios
- Lighting modifiers for portrait photography
Questions? Please post them in the comments section below.
Comments
This seems to have been photographed in a “darker room.” Would you light setting been different if this was shot in a white room?
Hi Vic, the topic covering the working space and its effect on your images starts in this class and then continues in the following where you can see the real world differences – https://visualeducation.com/class/studio-lighting-setups-portraits-one-light-setup-16/ Kind regards Karl.
Hi Karl, really like the way you are using the 30×120 soft boxes and the light you are getting from them. Never thought of using them this way, only used them for rim light, but will try this out. Thanks again.
I am getting a bit confused about what you use to determine proper exposure. Seems to be something that you eyeball. Is there any rule of thumb for what RGB values to shoot for on skin tones?
Hi, I always just eyeball it. If you have a high quality calibrated screen then that should be enough. Photography is a visual medium and human visual perception has a number of anomalies including an inability to perceive things accurately when surrounded by disparate exposure or colour ranges, therefore it is important that the results we arrive at are not a ‘colour by numbers’ approach but one that takes into consideration our visual failings and adjusts for them. The following classes will teach you more:
https://visualeducation.com/class/measuring-light-and-achieving-correct-exposure/
https://visualeducation.com/class/photoshop-demonstration-colour-techniques-2/
https://visualeducation.com/class/a-guide-to-lighting-emotion/
https://visualeducation.com/class/the-emotion-of-light-july-12th/
I just joined Karl Taylor Education yesterday and am enjoying the classes very much! Can you offer some comment as to how the 2 softboxes were aimed? It seems as though the horizontal box was aimed just below the models face thereby feathering the light on her face. It seems as though the vertical softbox on camera right was aimed just to the right of the model. Is this correct?
If I may ask a second question. Is there a class that shows the Photoshop technique that was used to remove the background light stand from the image. The light gradient on the background would seem to make the removal something less than a simple task.
thanks for the help!
Pete
Hi Pete, thank you for signing up and I’m glad you are enjoying our content. I hope you can join us on our live shows too! The horizontal softbox is placed about 1.5m away from the model and 50cm higher than the model and then pointed down at them at a 45 degree angle. The vertical one then slots up against it but is left almost parallel to the background for a quicker shadow fall off on the models shadow side (left side from camera perspective). For your second question we have many post production classes, I’d suggest completing the photoshop for photographers first before moving onto the Advanced one as the class with Viktor is very advanced. There are also individual ‘tools’ classes and the techniques you mention are covered in several modules on different subjects. There are also additional post production classes attached to certain product shoots in the product section too. If you have any other questions don’t hesitate to ask. All the best Karl.
Thank you
Hi Karl, great tutorial. How did you manage to not have any light from the vertical stripbox affect the background?
Hi Thanks, Often the lights will have an affect on the background especially in a small space. I counter this by generally using visually darker grey backgrounds than average knowing that the additinoal light will be lifting them up. But also the inverse square law will have an important role to play in that the distance of the lights from your model will greatly affect the amount of light on the background based on the required exposure of your model. So for example even if the lights are closer to your model (and background) the background will appear darker because you need to greatly reduce the exposure for your model. See this chapter to learn more – https://visualeducation.com/class/introduction-and-understanding-light/
Great tutorials Karl!
for portrait model shoot for Jewelry, which lighting setups would you recommend from your tutorials that will help create dynamic and catchy looks..like top 2 or 3 go to setups
Thank you,
Qais
Hi Thanks, you might like to try these –
https://visualeducation.com/class/studio-lighting-setups-portraits-two-light-34/
https://visualeducation.com/class/studio-lighting-setups-portraits-four-light-55/
Thank you! two of my favorites actually 🙂
Hi..can you, please, explain on this one..the measures that you used on the strobes..as I understand the aperture of you camera and the key light should be the same..so..i’m Been seeing that you do not use this rule..thanks
Hi Liliana, I’m sorry I don’t fully understand your question? If you are asking do I use the same aperture setting on all shots I shoot then no I don’t. My procedure is to decide the aperture setting that I want for a particular shot based on my depth of field requirements and then I adjust the power of all my lights to suit that aperture.
Hi Karl,
is there rule/logic/science/guidelines behind the method of choosing the aperture for each shot?
yeah i technically understand what aperture – depth of field relationship is but i mean how to decide whether to go shallow/deep/in between ?
Hi Ahmed, there are no fixed rules. But generally fashion shots are usually f11, f16 to ensure good depth of field and sharpness across the entire model and outfit and the same for beauty shots. For portraiture it’s often wider open as sometimes shallow depth of field portraits have a bit more ‘softer’ feel to them but that’s not always the case as it depends on the character. For product photography it’s nearly always enough DOF to ensure all of the product is sharp and that may require a smaller aperture as well as focus stacking or tilt and shift.
Thanks Karl for the prompt reply and being generous with your information. I totally get it now 🙂
Hello Karl, I was wondering if you use any type of filters in portaits (UV, ND etc..), and how they affect (if used) the results on the pictures?. Thank You.
Hi Daniel, no not really and ND filter would only reduce the amount of light so you can open the aperture more or decrease the shutter speed but it wouldn’t have any affect on the subject. Polarisers change the look of skin reflections but you’d have to be careful applying these as you can get strange results. Generally speaking all of your control should be made with light.
Excellent session tutorial! I shall be using this style. Looks like I’ll be adding another strip soft box modifier to equipment bag.
Karl,
What did you do to remove the tripod from the back light of the final photo?
Hi Ilidio, the centre pole of the lighting stand was visible between the models legs so I removed this in photoshop. To avoid having to use photoshop then I often use a flooter/fresnel light instead as you will seen in the ‘Fashion’ section on the first two tutorials.
Hi Karl
I really like this light setup. The effect is strong and bold.
I’ve watched all of the one, two and am learning the three light setup and it is phenomenal content.
I have a broader question about your choice on whether the shot is head only, 1/2 body, 3/4 body or full length.
Outside of the creative choice, do you have some decision process you use when combining with particular lighting setups?
Thanks!
Derrick
Hi Derrick, thanks for your feedback. Creative decisions on 1/2 body or full length etc usually come down to what we are trying to show in terms of the fashion or outfits nothing else really. Beauty shots are nearly always head or head, neck and some shoulder because the focus is on the makeup/hair etc. (and we have a new series of these shoots coming next year). Lighting choices will be dicatated by the textile material, potentially the look of the model but mostly based on the emotion/mood i’m trying to convey.